Run Supabase on Your Own Server with Docker Compose
If you want full control over your backend, learning how to self host Supabase with Docker Compose on your own dedicated server is one of the best decisions you can make. You will get a private Postgres database, authentication, file storage, and a REST API, all running on your server, without sending your data to anyone else’s cloud.
In this guide, you will learn everything from picking the right server to your first working API call.
Table of Contents
Key Differences between Self-Hosted vs. Cloud Supabase
Before you start, it helps to know what changes when you self-host Supabase:
| Feature | Cloud Supabase | Self-Hosted Supabase |
|---|---|---|
| Setup Time | Instant | 30 to 60 Minutes |
| Updates | Automatic | Manual, Monthly Releases |
| Backups | Managed | You Configure It |
| Dashboard Access | Always Available | Protected by HTTP Basic Auth |
| SMTP Email | Built-in Test Server | You Bring Your Own SMTP |
| Database Connection | Connection String in the Dashboard | Via Supavisor Pooler |
| Scaling | Auto-Managed | You Manage |
| Cost | Usage-based | Fixed Server Cost |
The main thing is that there is no connection string shown in the Studio dashboard for self-hosted setups; you build it from your .env file.
Server Requirements to Self Host Supabase with Docker Compose
To self host Supabase with Docker Compose, you need a dedicated server or VPS running Linux, Ubuntu 22.04 or 24.04 recommended. Here are the specs you need to run Supabase:
| Resource | Minimum | Recommended |
|---|---|---|
| RAM | 4 GB | 8 GB+ |
| CPU | 2 Cores | 4 Cores+ |
| Disk | 50 GB SSD | 80 GB+ SSD |
For a real production setup, go with the recommended specs. A 4 GB RAM server will run everything, but will feel slow under load. If you plan to use Logflare analytics, Realtime, or Edge Functions heavily, 8 GB+ is a much better starting point.
A dedicated server gives you consistent performance with no noisy neighbors, which matters a lot when running 12+ Docker containers at once. For stable infrastructure built for workloads like this, you can check the Dedicated Server Hosting Plans from PerLod.
Step 1: Install Docker and Git for Supabase
First, you must connect your server via SSH, run the system update, and install the required tools:
sudo apt update && sudo apt upgrade -y
sudo apt install git -y
Install Docker Engine:
curl -fsSL https://get.docker.com | sh
sudo usermod -aG docker $USER
newgrp docker
Install Docker Compose plugin:
sudo apt install docker-compose-plugin -yVerify the installations by checking the version:
docker --version
docker compose version
git --version
Also, you need OpenSSL for generating secrets, which is usually pre-installed on Ubuntu:
openssl versionStep 2: Clone the Supabase Repository
The official Docker Compose setup lives inside the main Supabase repo. You can clone it and set up your project folder with the commands below:
# Clone the Supabase repo
git clone --depth 1 https://github.com/supabase/supabase

# Create your own project directory
mkdir supabase-project

# Copy all Docker files into your project folder
cp -rf supabase/docker/* supabase-project

# Copy the example environment file
cp supabase/docker/.env.example supabase-project/.env

# Move into your project directory
cd supabase-projectNote: If you are running rootless Docker, open .env and set DOCKER_SOCKET_LOCATION to your socket path, for example, /run/user/1000/docker.sock. Otherwise, the Vector container will exit immediately.
Step 3: What Services Are Included in the Supabase Docker Compose YAML File?
When you self host Supabase with Docker Compose, the docker-compose.yml file includes the following services:
| Service | Role |
|---|---|
| Studio | Web dashboard for managing your project |
| Kong | API gateway, routes all external requests |
| Auth | JWT-based authentication, including sign-up, login, and sessions |
| PostgREST | Turns your Postgres tables into a REST API automatically |
| Realtime | Listens to Postgres changes, broadcasts over WebSockets |
| Storage | RESTful file storage with permission via Postgres RLS |
| imgproxy | Fast image resizing and transformation |
| postgres-meta | API for managing Postgres, including tables, roles, and queries |
| PostgreSQL | The core database |
| Edge Runtime | Runs Deno-based Edge Functions |
| Logflare | Log ingestion and analytics |
| Vector | Collects and routes observability data |
| Supavisor | Postgres connection pooler |
Note: All traffic from the outside goes through Kong on port 8000. You do not need to expose individual service ports to the internet.
Step 4: Generate Secure Secrets
You should remember that never start your self-hosted Supabase with the default example credentials. The .env.example file ships with placeholder values meant only to show the format.
Run the key generation script included in the repo:
sh utils/generate-keys.shThen run the second script to add the new API keys and asymmetric key pair:
sh utils/add-new-auth-keys.shThese scripts automatically update your .env file with cryptographically secure values for:
POSTGRES_PASSWORD: your database password.JWT_SECRET: signs and verifies all JWTs across services.SUPABASE_PUBLISHABLE_KEY: safe to use in frontend code.SUPABASE_SECRET_KEY: server-side only, bypasses Row Level Security.SECRET_KEY_BASE: secures Realtime and Supavisor communications. Minimum 64 chars.VAULT_ENC_KEY: Supavisor encryption key. Must be exactly 32 chars.MINIO_ROOT_PASSWORD: MinIO storage admin password.LOGFLARE_PUBLIC_ACCESS_TOKENandLOGFLARE_PRIVATE_ACCESS_TOKEN.
Open the .env file and verify that none of these values are still the placeholder defaults before continuing:
nano .envStep 5: Configure Your URLs and Domain
At this point, you need to tell Supabase what public URL it will be reachable at. In your .env file, update these three variables:
SUPABASE_PUBLIC_URL=http://your-server-ip:8000
API_EXTERNAL_URL=http://your-server-ip:8000
SITE_URL=http://your-app-domain.com:3000
If you have a domain name pointing to your server, use that instead of the raw IP. If you plan to set up HTTPS with a reverse proxy, use https:// and your domain here.
Then, set the Studio dashboard password, which protects access to the admin panel:
DASHBOARD_USERNAME=admin
DASHBOARD_PASSWORD=YourStrongPasswordHere123
The password must include at least one letter. Do not use numbers only or special characters.
Tip: If you need a domain name for a clean production setup, PerLod’s domain registration service makes it easy to grab one and point it at your server in minutes.
Step 6: Configure SMTP for Emails
Supabase cannot send auth emails, like signup confirmation and password reset, without an SMTP server. In your .env file, fill in:
SMTP_ADMIN_EMAIL=no*****@********in.com
SMTP_HOST=smtp.yourmailprovider.com
SMTP_PORT=587
SMTP_USER=your-smtp-username
SMTP_PASS=your-smtp-password
SMTP_SENDER_NAME=YourAppName
AWS SES, Mailgun, Resend, and Postmark all work well here. This is one of the biggest practical differences from the cloud version. On the Supabase cloud, a test SMTP server is included.
Step 7: Pull Docker Images and Start Supabase
With your secrets and URLs configured, you can pull the latest Docker images with the command below:
docker compose pullOnce the pulling is completed, start all services in detached mode:
docker compose up -dThis will take a minute or two on the first run while the database initializes. Check the status of all containers:
docker compose psYou should see all services showing the Up and Healthy status. If a container shows created but not Up, run the built-in test script:
sh tests/test-container-logs.shOr explore logs for a specific service, for example:
docker compose logs analytics
docker compose logs kong
docker compose logs auth
Step 8: Open the Right Firewall Ports for Supabase
For a self host Supabase with Docker Compose setup, you only need two ports open to the internet by default. Here we assume you use the UFW firewall:
sudo apt install ufw -y
sudo ufw allow 22/tcp    # SSH
sudo ufw allow 8000/tcp  # Kong API gateway (HTTP)
sudo ufw allow 80/tcp    # HTTP (for reverse proxy)
sudo ufw allow 443/tcp   # HTTPS (for reverse proxy)
sudo ufw enable
Do not expose these ports externally; they should only be accessible internally between containers:
- 5432: PostgreSQL direct access.
- 6543: Supavisor transaction pooler.
- 3000: Studio, expose only via the API gateway or reverse proxy.
Step 9: First Login to the Supabase Studio Dashboard
At this point, you can open your browser and go to:
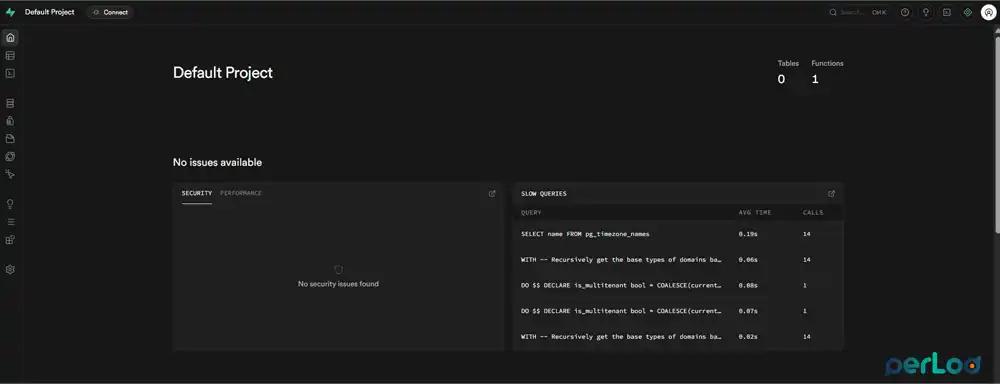
http://your-server-ip:8000You will be asked for a username and a password. Use the DASHBOARD_USERNAME and DASHBOARD_PASSWORD values you set in your .env file.
Once logged in, you will see the full Supabase Studio interface, the same dashboard you see on Supabase Cloud, but running entirely on your server. From here you can:
- Create and manage tables in the Table Editor.
- Write and test SQL in the SQL Editor.
- Manage authentication settings and users.
- Set up Row Level Security (RLS) policies.
- Browse storage buckets and files.
- Monitor Edge Function logs.
Step 10: Test Your API Endpoints
All APIs are available through the Kong gateway on port 8000. You can run these curl commands to verify everything works. Replace your-server-ip with your actual IP or domain, and your-publishable-key with the SUPABASE_PUBLISHABLE_KEY from your .env file.
Test the REST API:
curl http://your-server-ip:8000/rest/v1/ \
  -H "apikey: your-publishable-key"
Test the Auth endpoint:
curl http://your-server-ip:8000/auth/v1/settings \
  -H "apikey: your-publishable-key"
Test the Edge Functions runtime:
curl http://your-server-ip:8000/functions/v1/helloA successful response from any of these confirms that Kong is routing correctly and your API keys are valid. If you get a 401 Unauthorized, double-check that the API key header value exactly matches SUPABASE_PUBLISHABLE_KEY in your .env.
Step 11: Connect Your Database
The self-hosted setup uses Supavisor as a connection pooler in front of Postgres. The connection string format is:
Session mode (port 5432):
postgres://postgres.[POOLER_TENANT_ID]:[POSTGRES_PASSWORD]@your-server-ip:5432/postgresTransaction mode (port 6543):
postgres://postgres.[POOLER_TENANT_ID]:[POSTGRES_PASSWORD]@your-server-ip:6543/postgresFind your POOLER_TENANT_ID and POSTGRES_PASSWORD in your .env file. The default tenant ID in the example file is your-tenant-id; change it to something meaningful before going live.
Set Up HTTPS with a Reverse Proxy for Supabase
HTTP is fine for testing, but for production, you need HTTPS, especially if you use OAuth providers for social login. The recommended way is to put Nginx or Caddy in front of Kong.
Install Nginx and allow web traffic:
sudo apt install nginx -y
sudo ufw allow 'Nginx Full'
sudo ufw reload
Create a new server block file for your Supabase domain:
sudo nano /etc/nginx/sites-available/supabaseHere is a minimal Nginx config for a single domain:
server {
    listen 80;
    server_name supabase.yourdomain.com;
    return 301 https://$host$request_uri;
}

server {
    listen 443 ssl;
    server_name supabase.yourdomain.com;

    ssl_certificate /etc/letsencrypt/live/supabase.yourdomain.com/fullchain.pem;
    ssl_certificate_key /etc/letsencrypt/live/supabase.yourdomain.com/privkey.pem;

    client_max_body_size 100M;

    location / {
        proxy_pass http://localhost:8000;
        proxy_set_header Host $host;
        proxy_set_header X-Real-IP $remote_addr;
        proxy_set_header X-Forwarded-For $proxy_add_x_forwarded_for;
        proxy_set_header X-Forwarded-Proto $scheme;
    }

    # Required for file storage uploads
    location ~ ^/storage/v1/(.*)$ {
        proxy_set_header Host $host;
        proxy_redirect off;
        proxy_pass http://localhost:8000;
    }
}
Important Note: Do not forget the client_max_body_size directive. Without it, file uploads to Supabase Storage will silently fail; the default Nginx limit is just 1 MB.
Enable the file, test the config, and reload Nginx:
sudo ln -s /etc/nginx/sites-available/supabase /etc/nginx/sites-enabled/
sudo nginx -t
sudo systemctl reload nginx
Use Certbot to get a free SSL certificate from Let’s Encrypt:
sudo apt install certbot python3-certbot-nginx -y
sudo certbot --nginx -d supabase.yourdomain.com
After setting up HTTPS, update your .env file to use https://:
SUPABASE_PUBLIC_URL=https://supabase.yourdomain.com
API_EXTERNAL_URL=https://supabase.yourdomain.com
Then restart your services:
docker compose down && docker compose up -dHow To Keep Supabase Updated
Supabase publishes tested Docker Compose releases once a month. To update:
# Pull the latest changes from the repo
git -C supabase pull

# Copy updated compose files (be careful not to overwrite your .env)
cp -rf supabase/docker/docker-compose.yml .
cp -rf supabase/docker/volumes .

# Pull new images
docker compose pull

# Restart services
docker compose down && docker compose up -d
Always check the self-hosted Supabase changelog before updating so you know if there are breaking changes or migration steps required.
How to Connect Your Application
In your frontend or backend app, you can use the Supabase JavaScript client the same way you would with the cloud version, just point it at your own server:
import { createClient } from '@supabase/supabase-js'

const supabase = createClient(
  'https://supabase.yourdomain.com',   // Your SUPABASE_PUBLIC_URL
  'your-publishable-key'               // Your SUPABASE_PUBLISHABLE_KEY
)
That’s it. Every SDK method, including supabase.from(), supabase.auth.signUp(), supabase.storage.from(), works the same as it does against the hosted platform.
Choosing the Right Server
For teams who want to self host Supabase with Docker Compose in production, the server choice matters a lot. A few things to look for:
- Dedicated resources: Avoid shared CPU plans; Supabase runs 12+ containers and needs consistent performance.
- NVMe SSD storage: Postgres is I/O heavy; spinning disks will bottleneck you.
- Root SSH access: Required for Docker installation and firewall configuration.
- Scalable specs: Start at 4 GB RAM and 4 CPU cores, plan to upgrade as you grow.
If you are still looking for which server works best before going full dedicated, this guide on the best VPS for Supabase self-hosting covers the right specs and configurations in detail.
Conclusion
Self-hosting Supabase with Docker Compose gives you a private backend fully under your control on your own server. After setup, it works almost the same as the cloud version, but you keep full control of your data and costs. For reliable infrastructure, you can use PerLod Dedicated Server Hosting for your production Supabase server.
FAQs
Why can’t I see my connection string in the Supabase Studio dashboard?
That feature is not available in self-hosted Studio. You must build the connection string manually using POSTGRES_PASSWORD and POOLER_TENANT_ID from your .env file.
Can I use my own domain with self-hosted Supabase?
Yes. Point your domain’s A record to your server IP, set SUPABASE_PUBLIC_URL in .env to your domain, and configure Nginx with a Let’s Encrypt certificate. After that, everything works through your custom domain.
Can I remove Supabase services I don’t need to save resources?
Yes. If you do not use Logflare, Realtime, Storage, imgproxy, or Edge Functions, you can remove those sections from docker-compose.yml to lower resource usage.

