How to Self-Host Flowise with Docker Compose, PostgreSQL, Redis, HTTPS, and Worker Mode
Flowise is an open-source and low-code tool for building AI agents, chatbots, and RAG pipelines with a drag-and-drop visual builder. When you self-host Flowise with Docker Compose, you keep full control of your data, API keys, and uptime rather than relying on a third-party cloud plan.
This guide covers PostgreSQL setup instead of the default SQLite file, Redis-backed queue mode, HTTPS, login protection, health checks, and a separate worker process that scales independently from the main app.
Table of Contents
Requirements Before You Start
Before you start, you need:
- A VPS running Ubuntu 22.04 or newer, with at least 2 vCPUs and 4 GB RAM.
- Root or sudo access over SSH.
- A domain or subdomain with an A record pointing to your server’s IP.
- Docker Engine and the Docker Compose plugin.
- Ports 80 and 443 open on your firewall.
If you don’t have a server yet, you can start with a fresh Linux VPS from PerLod, which gives you clean root access and enough resources to self-host Flowise with Docker Compose alongside PostgreSQL, Redis, and a worker container.
Step 1. Prepare Your Server
First, SSH into your server and run the system update and upgrade:
ssh root@your-server-ip
apt update && apt upgrade -y
Install the required tools with:
apt install curl git ufw -yOpen the required ports and enable the firewall:
ufw allow OpenSSH
ufw allow 80/tcp
ufw allow 443/tcp
ufw enable
You can use the Docker script to install Docker and Docker Compose:
curl -fsSL https://get.docker.com | sh
usermod -aG docker $USER
Log out and back in, then verify:
docker --version
docker compose version
If both return version numbers, your server is ready to self-host Flowise with Docker Compose.
Note: For production use, it is better to install Docker by adding the official repository.
Step 2. Create the Project Folder
Now you must create a project folder and the required files for a clean setup:
mkdir -p ~/flowise-stack
cd ~/flowise-stack
mkdir -p data/flowise data/postgres data/redis data/caddy
These folders hold persistent data so nothing is lost on restart, which is a key detail whenever you self-host Flowise with Docker Compose for real use.
Step 3. Configure Environment Variables
At this point, use your desired text editor to create the .env file:
nano .envPaste the following content with your values:
# Flowise
FLOWISE_PORT=3000
FLOWISE_USERNAME=admin
FLOWISE_PASSWORD=ChangeThisPassword123!

# PostgreSQL
POSTGRES_DB=flowisedb
POSTGRES_USER=flowiseuser
POSTGRES_PASSWORD=ChangeThisDbPassword123!

# Redis
REDIS_PASSWORD=ChangeThisRedisPassword123!

# Worker / Queue mode
MODE=queue
QUEUE_NAME=flowise-queue
WORKER_CONCURRENCY=5

# Domain
DOMAIN=flowise.yourdomain.com
Once you are done, save and close the file.
Point your domain’s A record to the server now. Managing this is simple if your domain registration is configured with PerLod, since DNS and hosting live in one place while you self-host Flowise with Docker Compose.
Step 4. Add a Domain and Enable HTTPS
Caddy automatically requests and renews a free TLS certificate from Let’s Encrypt. Create the Caddyfile:
nano CaddyfileAdd this with your domain:
flowise.yourdomain.com {
    reverse_proxy flowise-main:3000
    encode gzip
}
This step turns a local test into something you can safely self-host Flowise with Docker Compose for real users over the public internet, instead of exposing plain HTTP.
Step 5. Add PostgreSQL Instead of SQLite
By default, Flowise stores everything in a local SQLite file, which is fine for a quick test, but risky for a real team.
Switching to PostgreSQL is the key step that lets you self-host Flowise with Docker Compose for multiple users safely, since Postgres handles concurrent writes and backs up cleanly.
The database is defined directly in the Compose file below, with a persistent volume so data survives restarts.
Step 6. The Docker Compose File to Self-Host Flowise with Docker Compose
Now use the command below to create the Docker Compose file for Flowise:
nano docker-compose.ymlPaste:
services:
  postgres:
    image: postgres:16
    container_name: flowise-postgres
    restart: always
    environment:
      POSTGRES_DB: ${POSTGRES_DB}
      POSTGRES_USER: ${POSTGRES_USER}
      POSTGRES_PASSWORD: ${POSTGRES_PASSWORD}
    volumes:
      - ./data/postgres:/var/lib/postgresql/data
    healthcheck:
      test: ["CMD-SHELL", "pg_isready -U ${POSTGRES_USER} -d ${POSTGRES_DB}"]
      interval: 10s
      timeout: 5s
      retries: 5
    networks:
      - flowise-net

  redis:
    image: redis:7-alpine
    container_name: flowise-redis
    restart: always
    command: redis-server --requirepass ${REDIS_PASSWORD}
    volumes:
      - ./data/redis:/data
    healthcheck:
      test: ["CMD", "redis-cli", "-a", "${REDIS_PASSWORD}", "ping"]
      interval: 10s
      timeout: 5s
      retries: 5
    networks:
      - flowise-net

  flowise:
    image: flowiseai/flowise:latest
    container_name: flowise-main
    restart: always
    depends_on:
      postgres:
        condition: service_healthy
      redis:
        condition: service_healthy
    ports:
      - "127.0.0.1:${FLOWISE_PORT}:3000"
    environment:
      PORT: 3000
      FLOWISE_USERNAME: ${FLOWISE_USERNAME}
      FLOWISE_PASSWORD: ${FLOWISE_PASSWORD}
      DATABASE_TYPE: postgres
      DATABASE_HOST: postgres
      DATABASE_PORT: 5432
      DATABASE_NAME: ${POSTGRES_DB}
      DATABASE_USER: ${POSTGRES_USER}
      DATABASE_PASSWORD: ${POSTGRES_PASSWORD}
      MODE: ${MODE}
      QUEUE_NAME: ${QUEUE_NAME}
      REDIS_HOST: redis
      REDIS_PORT: 6379
      REDIS_PASSWORD: ${REDIS_PASSWORD}
    volumes:
      - ./data/flowise:/root/.flowise
    healthcheck:
      test: ["CMD-SHELL", "wget -qO- http://localhost:3000/api/v1/ping || exit 1"]
      interval: 15s
      timeout: 5s
      retries: 5
    networks:
      - flowise-net

  flowise-worker:
    image: flowiseai/flowise:latest
    restart: always
    entrypoint: /bin/sh -c "sleep 5; flowise worker"
    depends_on:
      postgres:
        condition: service_healthy
      redis:
        condition: service_healthy
    environment:
      DATABASE_TYPE: postgres
      DATABASE_HOST: postgres
      DATABASE_PORT: 5432
      DATABASE_NAME: ${POSTGRES_DB}
      DATABASE_USER: ${POSTGRES_USER}
      DATABASE_PASSWORD: ${POSTGRES_PASSWORD}
      MODE: ${MODE}
      QUEUE_NAME: ${QUEUE_NAME}
      WORKER_CONCURRENCY: ${WORKER_CONCURRENCY}
      REDIS_HOST: redis
      REDIS_PORT: 6379
      REDIS_PASSWORD: ${REDIS_PASSWORD}
    volumes:
      - ./data/flowise:/root/.flowise
    networks:
      - flowise-net

  caddy:
    image: caddy:2-alpine
    container_name: flowise-caddy
    restart: always
    ports:
      - "80:80"
      - "443:443"
    volumes:
      - ./Caddyfile:/etc/caddy/Caddyfile
      - ./data/caddy:/data
    depends_on:
      - flowise
    networks:
      - flowise-net

networks:
  flowise-net:
    driver: bridge
Save and close the file. The worker entrypoint and MODE/QUEUE_NAME/REDIS_* variables above match the official Flowise queue-mode pattern exactly.
Step 7. Enable Worker Mode for Scaling
The flowise-worker service runs in queue mode, the correct way to self-host Flowise with Docker Compose once more than a few people use it. The main container only accepts requests and queues them in Redis; the worker executes the LLM chains and writes results to PostgreSQL.
Scale workers without touching the main app:
docker compose up -d --scale flowise-worker=3This starts three workers pulling from the same queue, one of the biggest reasons teams choose to self-host Flowise with Docker Compose instead of one all-in-one container.
Step 8. Turn On Authentication and Health Checks
Login is already active via FLOWISE_USERNAME/FLOWISE_PASSWORD, visitors see a login screen before reaching the builder. This is required any time you self-host Flowise with Docker Compose on a public server.
Health checks are defined for Postgres, Redis, and Flowise itself, so Compose won’t start dependents until each is truly ready:
docker compose psEvery service should show healthy.
Step 9. Launch the Full Stack
Use the commands below to launch the full Flowise stack:
docker compose up -d
docker compose logs -f flowise flowise-worker
Once healthy, open your browser and visit:
https://flowise.yourdomain.comYou will see the Flowise admin account setup screen. Create the admin account and sign up:
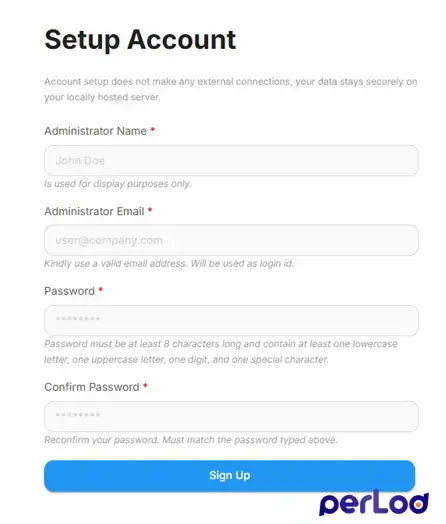
Now you self-host Flowise with Docker Compose in production, backed by PostgreSQL, Redis queues, HTTPS, and a dedicated worker.
Testing: Build and Run an Agent Flow
From the Flowise dashboard, click Add New to create a chatflow.
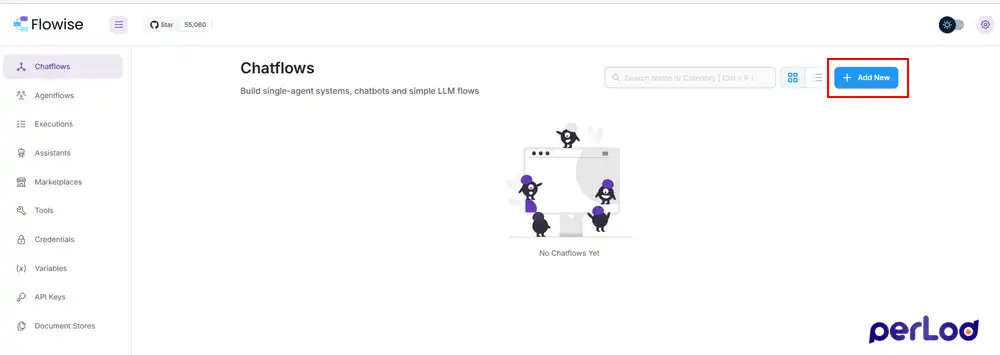
Then:
- Drag a Chat Model node onto the canvas and add your API key credential.
- Connect it to a Conversation Chain node.
- Click Save, then test in the built-in chat panel.
A correct reply proves the worker and Redis pipeline work; this way to self-host Flowise with Docker Compose is fully functional.
Grab the endpoint from the chatflow’s API tab and test via terminal:
curl https://flowise.yourdomain.com/api/v1/prediction/<your-chatflow-id> \
  -X POST \
  -H "Content-Type: application/json" \
  -H "Authorization: Bearer <your-api-key>" \
  -d '{"question": "Hello, are you running through the worker?"}'
A JSON response with your model’s answer confirms the API, HTTPS, and worker pipeline all work together, meaning you now self-host Flowise with Docker Compose end to end, from the browser to the API.
Note: the first time Flowise connects to PostgreSQL, it needs the uuid-ossp extension enabled. If you hit a database error on first launch, run :
docker exec -it flowise-postgres psql -U flowiseuser -d flowisedb -c "CREATE EXTENSION IF NOT EXISTS \"uuid-ossp\";"
docker compose restart flowise flowise-worker
Flowise Backups and Persistent Storage
All data lives in data/postgres, data/redis, and data/flowise, so backing up is simple:
tar -czvf flowise-backup-$(date +%F).tar.gz data/ .env docker-compose.yml CaddyfileStore this archive off the server, such as object storage or another machine. Backing up regularly is essential once you self-host Flowise with Docker Compose for a team, since chatflows, credentials, and chat history all live in that PostgreSQL volume.
Conclusion
At this point, you have a complete and production-style way to self-host Flowise with Docker Compose, including PostgreSQL for reliable storage, Redis-backed queue mode for scaling, HTTPS through Caddy, login protection, health checks, and a separate worker container that keeps heavy AI jobs from blocking the main app.
This setup is ready for real teams, not just a single-user demo, and it grows with you as you add more workers or move to bigger server resources.
We hope you enjoy this guide.
For deeper detail on queue mode and worker configuration straight from the source, see the official Flowise documentation on running Flowise using queue.
FAQs
Do I need PostgreSQL, or can I keep SQLite for Flowise?
SQLite works for solo testing, but PostgreSQL is required if multiple people use Flowise at the same time, since it handles concurrent writes safely.
Is Redis required to self-host Flowise with Docker Compose?
Only if you run queue mode with workers. For a single-user setup, you can skip Redis and the worker container entirely.
Can I run more than one worker in Flowise?
Yes, use this command: docker compose up -d --scale flowise-worker=N, replacing N with the number you need.
Where are my Flowise chatflows stored?
Inside the PostgreSQL database, in the data/postgres folder on your server, included in your backup archive.

