
Deploy TensorFlow Serving on Dedicated Servers
TensorFlow Serving is a powerful, flexible system designed for serving machine learning models in production environments. By deploying TensorFlow Serving on dedicated servers, you can gain better performance, scalability, and security for your AI-powered applications. This setup allows you to host trained TensorFlow models, handle real-time predictions, and seamlessly integrate machine learning into your web or mobile platforms.
A dedicated server gives you full control over resources, enables smooth model updates, faster response times, and the ability to handle higher traffic without downtime. Whether you’re running a small AI project or a large-scale machine learning service, combining TensorFlow Serving with a reliable dedicated hosting solution ensures a professional and production-ready environment.
Now proceed to the rest of the article to deploy TensorFlow Serving on a dedicated server. In this guide to show you the steps we will use on a fresh Ubuntu 22.04 or Ubuntu 24.04 dedicated server (CPU-only or NVIDIA GPU).
Table of Contents
Steps To Deploy TensorFlow Serving on Dedicated Servers
This guide covers model export, directory structure, Docker and native installs, config for multi-model and versioning, batching, performance tuning, monitoring, security, reverse proxy, systemd, and client examples.
Let’s dive into the guide steps by preparing the server.
Prepare a Dedicated Server for TensorFlow Serving
Every successful deployment starts with a properly configured server. You must install essential system packages, set up firewall rules, and create a directory where all your models will be stored.
First, update the server and install the required packages with the following commands:
sudo apt update
sudo apt install ca-certificates curl jq unzip ufw -y
sudo ufw allow OpenSSH
sudo ufw enable
This ensures your system is secure, up-to-date, and ready to run TensorFlow Serving.
Then, you must create a Model Repository. TensorFlow Serving expects models to live in a central folder. We will keep models in /srv/tfmodels:
sudo mkdir -p /srv/tfmodels
sudo chown $USER:$USER /srv/tfmodels
This directory will hold all model versions in the proper format.
Next, you must export a TensorFlow Model, for example, in Python. Here’s an example of exporting a MobileNetV2 model. This creates the versioned SavedModel layout expected by TF Serving:
# save_model.py
import tensorflow as tf, pathlib
model = tf.keras.applications.MobileNetV2(weights=None, classes=10)
model.build([None, 224, 224, 3])
model.save("mobilenetv2/1")  # version "1"
Once you are done, run the script:
python3 save_model.py
mv mobilenetv2 /srv/tfmodels/
ls -R /srv/tfmodels/mobilenetv2
# -> 1/saved_model.pb and variables/
That layout is the standard SavedModel on disk.
Install TensorFlow Serving on Dedicated Servers | Docker or Native Install
TensorFlow Serving can be installed in two main ways:
- Using Docker is recommended for flexibility and portability.
- Via a native APT package, which is useful for minimal setups.
Here we will explain both methods; you can choose the right method depending on your needs.
Method 1. Installing TensorFlow Serving with Docker (Recommended)
This method is recommended because Docker simplifies updates and management. First, set up Docker with the following commands:
curl -fsSL https://get.docker.com | sudo sh
sudo usermod -aG docker $USER
newgrp dockerNote: If your server has an NVIDIA GPU, you must install the appropriate NVIDIA driver for your card and install NVIDIA Container Toolkit:
distribution=$(. /etc/os-release;echo $ID$VERSION_ID)

curl -fsSL https://nvidia.github.io/libnvidia-container/gpgkey | sudo gpg --dearmor -o /usr/share/keyrings/nvidia-container-toolkit-keyring.gpg

curl -fsSL https://nvidia.github.io/libnvidia-container/$distribution/libnvidia-container.list \
 | sed 's#deb https://#deb [signed-by=/usr/share/keyrings/nvidia-container-toolkit-keyring.gpg] https://#g' \
 | sudo tee /etc/apt/sources.list.d/nvidia-container-toolkit.list

sudo apt update && sudo apt install nvidia-container-toolkit -y
sudo nvidia-ctk runtime configure --runtime=docker
sudo systemctl restart docker
Then, check your GPU access with the commands below:
nvidia-smi    # host sees GPU
docker run --rm --gpus all nvidia/cuda:12.2.0-base-ubuntu22.04 nvidia-smi
For Docker GPU, you only need the NVIDIA driver and container toolkit; the CUDA toolkit on the host isn’t required. You can use the –gpus flag.
Once you are done with Docker setup, you can pull the TensorFlow Serving image with the following Docker command:
docker pull tensorflow/serving:latest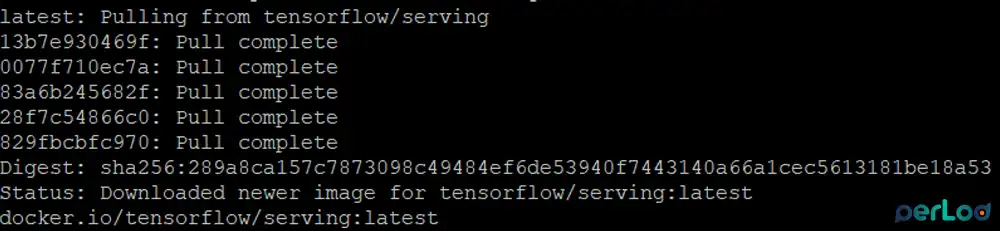
For GPU, you can run:
docker pull tensorflow/serving:latest-gpuAfter pulling the image, you can run a single model for a quick start.
For CPU, you can run:
docker run -d --name tfs-mobilenetv2 \
-p 8500:8500 -p 8501:8501 \
-v /srv/tfmodels/mobilenetv2:/models/mobilenetv2 \
-e MODEL_NAME=mobilenetv2 \
tensorflow/serving:latest
For GPU, you can run:
docker run -d --name tfs-mobilenetv2-gpu \
--gpus all \
-p 8500:8500 -p 8501:8501 \
-v /srv/tfmodels/mobilenetv2:/models/mobilenetv2 \
-e MODEL_NAME=mobilenetv2 \
tensorflow/serving:latest-gpu
At this point, TensorFlow Serving is running and ready to serve predictions.
Method 2. Installing TensorFlow Serving with APT
If you don’t want to use Docker, you can natively install TensorFlow Serving with APT. To do this, you can run the commands below:
echo "deb [arch=amd64] http://storage.googleapis.com/tensorflow-serving-apt stable tensorflow-model-server tensorflow-model-server-universal" | sudo tee /etc/apt/sources.list.d/tensorflow-serving.list

curl -fsSL https://storage.googleapis.com/tensorflow-serving-apt/tensorflow-serving.release.pub.gpg | sudo apt-key add -

sudo apt update && sudo apt install tensorflow-model-server -y
Binary will be available at:
/usr/bin/tensorflow_model_serverSet up TensorFlow Serving for Multiple Models and Versions
Real-world applications often require serving multiple models or multiple versions of the same model. In this step, you’ll learn how to set up TensorFlow Serving to handle more than one model using a models.config file with automatic hot reloading.
First, prepare model directories with the command below. This is an example model with two versions. Each version goes into its own numbered folder:
mkdir -p /srv/tfmodels/resnet50/{1,2}Copy your SavedModel into each version folder accordingly.
Then, create the models.config file which tells TensorFlow Serving to load both models and watch for updates:
cat >/srv/tfmodels/models.config <<'EOF'
model_config_list {
  config {
    name: "mobilenetv2"
    base_path: "/models/mobilenetv2"
    model_platform: "tensorflow"
    model_version_policy { all: {} }  # serve all discovered versions
  }
  config {
    name: "resnet50"
    base_path: "/models/resnet50"
    model_platform: "tensorflow"
    model_version_policy { all: {} }
  }
}
EOF
This is the standard Model Server config format (ModelConfigList) for multiple models and version policies.
Next, launch with config and hot reload:
docker run -d --name tfs-multi \
  -p 8500:8500 -p 8501:8501 \
  -v /srv/tfmodels/mobilenetv2:/models/mobilenetv2 \
  -v /srv/tfmodels/resnet50:/models/resnet50 \
  -v /srv/tfmodels/models.config:/models/models.config \
  tensorflow/serving:latest \
  --model_config_file=/models/models.config \
  --model_config_file_poll_wait_seconds=60
Now you can run multiple models with automatic reload when versions change.
Enable Server-Side Batching for Better Throughput
When handling high traffic, batching requests can improve performance by processing them together instead of one by one. Here, we want to configure server-side batching for better throughput without sacrificing response time.
First, create a batching config with the following command:
sudo tee /srv/tfmodels/batching.config >/dev/null <<'EOF'
max_batch_size { value: 32 }
batch_timeout_micros { value: 1000 }     # 1ms
num_batch_threads { value: 4 }
max_enqueued_batches { value: 1000 }
EOF
Then, run with batching:
docker run -d --name tfs-batched \
  -p 8500:8500 -p 8501:8501 \
  -v /srv/tfmodels/mobilenetv2:/models/mobilenetv2 \
  -v /srv/tfmodels/batching.config:/etc/tfs/batching.config \
  -e MODEL_NAME=mobilenetv2 \
  tensorflow/serving:latest \
  --enable_batching=true \
  --batching_parameters_file=/etc/tfs/batching.config
This config is ideal for high-traffic applications.
Set up TensorFlow Serving for Optimizing Resource Usage
In this step, you’ll learn how to adjust TensorFlow Serving options to maximize the performance of your CPU or GPU resources. You can fine-tune TensorFlow Serving with flags. For example:
--rest_api_num_threads=48 \
--tensorflow_intra_op_parallelism=8 \
--tensorflow_inter_op_parallelism=4
This is adjusted based on CPU cores and latency needs. The flags above are supported by tensorflow_model_server and commonly tuned.
Enable TensorFlow Serving Prometheus Endpoint
As you must know, monitoring is essential for maintaining reliable machine learning services. This step shows you how to enable TensorFlow Serving’s Prometheus endpoint so you can track metrics like request counts, latencies, and errors in real time.
First, create a monitoring config with:
sudo tee /srv/tfmodels/monitoring.config >/dev/null <<'EOF'
prometheus_config {
  enable: true
  path: "/monitoring/prometheus/metrics"
}
EOF
Then, start TensorFlow Serving with monitoring enabled:
docker run -d --name tfs-mon \
  -p 8500:8500 -p 8501:8501 \
  -v /srv/tfmodels/mobilenetv2:/models/mobilenetv2 \
  -v /srv/tfmodels/monitoring.config:/etc/tfs/monitoring.config \
  -e MODEL_NAME=mobilenetv2 \
  tensorflow/serving:latest \
  --rest_api_port=8501 \
  --monitoring_config_file=/etc/tfs/monitoring.config
Verify metrics with the command below:
curl -s localhost:8501/monitoring/prometheus/metrics | headNow Prometheus can scrape performance metrics.
Interact with TensorFlow Serving: Accessing Models via REST and gRPC
Once the server is running, clients need to send prediction requests. This step introduces the two main ways of interacting with TensorFlow Serving:
- REST: Simple and universal.
- gRPC: Faster and more efficient for high-performance systems.
For REST predict:
# Latest version
curl -s -X POST \
  -H "Content-Type: application/json" \
  -d '{"instances":[[0,0, ... image/inputs ... ]]}' \
  http://localhost:8501/v1/models/mobilenetv2:predict | jq

# Specific version
curl -s -X POST -H "Content-Type: application/json" \
  -d '{"instances":[[...]]}' \
http://localhost:8501/v1/models/mobilenetv2/versions/1:predictNote: REST endpoints, request shape, and versioned URLs are defined in the REST API docs.
For gRPC Python:
# client_grpc.py
import grpc, json
from tensorflow_serving.apis import predict_pb2, prediction_service_pb2_grpc
from tensorflow.core.framework import tensor_pb2, types_pb2, tensor_shape_pb2

channel = grpc.insecure_channel("localhost:8500")
stub = prediction_service_pb2_grpc.PredictionServiceStub(channel)

req = predict_pb2.PredictRequest()
req.model_spec.name = "mobilenetv2"  # or set version: req.model_spec.version.value = 1

# Build a TensorProto input named according to your SavedModel signature
vals = [0.0] * (224*224*3)
tensor = tensor_pb2.TensorProto(
    dtype=types_pb2.DT_FLOAT,
    tensor_shape=tensor_shape_pb2.TensorShapeProto(dim=[
        tensor_shape_pb2.TensorShapeProto.Dim(size=1),
        tensor_shape_pb2.TensorShapeProto.Dim(size=224),
        tensor_shape_pb2.TensorShapeProto.Dim(size=224),
        tensor_shape_pb2.TensorShapeProto.Dim(size=3),
    ]),
    float_val=vals
)
req.inputs["input_1"].CopyFrom(tensor)  # change name to match your signature

res = stub.Predict(req, timeout=10.0)
print(res.outputs.keys())Tip: Inspect your model’s SignatureDefs to know exact input and output names and dtypes:
saved_model_cli show --dir /srv/tfmodels/mobilenetv2/1 --allSecure TensorFlow Serving with Nginx Reverse Proxy and TLS
Displaying TensorFlow Serving ports directly is insecure. You can use Nginx as a reverse proxy with HTTPS/TLS encryption for more security. Now you will learn to set up a secure domain endpoint for safe model access.
First, bind the TensorFlow Serving locally:
docker run -d --name tfs-internal \
  -p 127.0.0.1:8500:8500 -p 127.0.0.1:8501:8501 \
  -v /srv/tfmodels/mobilenetv2:/models/mobilenetv2 \
  -e MODEL_NAME=mobilenetv2 \
  tensorflow/serving:latest
Then, set up Nginx and Certbot:
sudo apt install nginx -y
sudo ufw allow 80,443/tcp
sudo certbot --nginx -d api.yourdomain.com
Next, create a minimal proxy file:
sudo nano /etc/nginx/sites-available/tfs.confAdd:
server {
  listen 443 ssl http2;
  server_name api.yourdomain.com;

  location /v1/ {
    proxy_pass http://127.0.0.1:8501;
    proxy_set_header Host $host;
    proxy_http_version 1.1;
  }

  location /monitoring/prometheus/metrics {
    allow 10.0.0.0/8; deny all;           # restrict scraping
    proxy_pass http://127.0.0.1:8501/monitoring/prometheus/metrics;
  }
}
Enable the configuration, check for syntax errors, and reload Nginx to apply the changes:
sudo ln -s /etc/nginx/sites-available/tfs.conf /etc/nginx/sites-enabled/
sudo nginx -t
sudo systemctl reload nginx
Run TensorFlow Serving Under Systemd
If you want TensorFlow Serving to start automatically on boot, you must run TensorFlow Serving under systemd. To do this, create a systemd unit file for TensorFlow Serving:
sudo nano /etc/systemd/system/[email protected]Add the following content to the file:
[Unit]
Description=TensorFlow Serving (%i)
After=docker.service
Requires=docker.service

[Service]
Restart=always
ExecStart=/usr/bin/docker run --rm \
  --name tfs-%i \
  -p 127.0.0.1:8500:8500 -p 127.0.0.1:8501:8501 \
  -v /srv/tfmodels/%i:/models/%i \
  -e MODEL_NAME=%i \
  tensorflow/serving:latest
ExecStop=/usr/bin/docker stop -t 10 tfs-%i

[Install]
WantedBy=multi-user.target
Then, enable and start the service with the commands below:
sudo systemctl daemon-reload
sudo systemctl enable --now tfs@mobilenetv2
sudo systemctl status tfs@mobilenetv2
Perform Health Checks | Verify TensorFlow Serving Model Status
Before clients rely on your service, you need to verify that models are loading correctly. In this step, you’ll learn how to perform health checks, read logs, and confirm that TensorFlow Serving is responding as expected.
To verify model status (REST), you can run:
curl -s http://127.0.0.1:8501/v1/models/mobilenetv2 | jq
curl -s http://127.0.0.1:8501/v1/models/mobilenetv2/versions/1 | jq
Check logs and preparations with:
docker logs -f tfs-mobilenetv2For rotating to a new version:
- Write new SavedModel into /srv/tfmodels/mobilenetv2/2/.
- TensorFlow Serving will detect the new version automatically (if using base_path) or via
--model_config_file_poll_wait_secondsif using config. - Clients can hit the latest or explicitly …/versions/2:predict.
Note: You can also use labels in config to shift traffic without changing clients.
Security Hardening Tips For TensorFlow Serving
Security is essential in production environments. Remember not to expose ports publicly; instead, use Nginx as a reverse proxy with TLS encryption. Also, lock the metrics path to internal networks.
Use firewall rules:
sudo ufw deny 8500/tcp
sudo ufw deny 8501/tcp
sudo ufw allow 80,443/tcp
Consider rate limits and auth in Nginx for the REST API, and keep Docker and base images updated.
Troubleshooting Common TensorFlow Serving Issues
Deployments don’t always go smoothly. This section covers common issues like model version errors, GPU not being detected, request timeouts, input/output mismatches, and how to fix them quickly.
- Shape/dtype mismatch: Check
saved_model_clito match input names and shapes.
- No versions available: Verify the versioned folder contains
saved_model.pbandvariables/. Also, verify permissions are readable by the container.
- GPU not used: Confirm
nvidia-smiworks in the host and inside the container via--gpus all. Ensure you pulled the latest GPU.
- Timeouts/thread starvation: Increase
--rest_api_num_threadstune--rest_api_timeout_in_msand add batching parameters.
- Prometheus endpoint empty: Ensure
--monitoring_config_fileis set and the REST port is enabled; hit /monitoring/prometheus/metrics.
Minimal Docker Compose Setup for TensorFlow Serving
For teams that prefer Docker Compose, this step provides a minimal Compose configuration. It simplifies managing TensorFlow Serving with a single YAML file that handles models, configurations, and restarts.
# docker-compose.yml
services:
  tfserving:
    image: tensorflow/serving:latest
    container_name: tfserving
    ports:
      - "8500:8500"
      - "8501:8501"
    volumes:
      - /srv/tfmodels/mobilenetv2:/models/mobilenetv2
      - /srv/tfmodels/models.config:/models/models.config
      - /srv/tfmodels/batching.config:/etc/tfs/batching.config
      - /srv/tfmodels/monitoring.config:/etc/tfs/monitoring.config
    command: >
      --model_config_file=/models/models.config
      --model_config_file_poll_wait_seconds=60
      --enable_batching=true
      --batching_parameters_file=/etc/tfs/batching.config
      --rest_api_num_threads=48
      --rest_api_timeout_in_ms=30000
      --monitoring_config_file=/etc/tfs/monitoring.config
restart: unless-stoppedNote: For a GPU with Compose, run the container using docker run --gpus all … as shown earlier. The official images support GPU when started with the NVIDIA runtime.
Testing TensorFlow Serving Setup
Finally, it’s time to confirm everything works. This step shows you how to send a test prediction request to your TensorFlow Serving instance to ensure your deployment is ready for real-world use.
cat >payload.json <<'EOF'
{"instances": [[[0,0,0],[0,0,0],...[trim to match your model]]] }
EOF

curl -s -X POST -H "Content-Type: application/json" \
  -d @payload.json \
  http://localhost:8501/v1/models/mobilenetv2:predict | jq
It confirms that TensorFlow Serving is working.
FAQs
Should I use Docker or a Native installation for TensorFlow Serving?
Docker is recommended because it makes upgrades, GPU support, and dependency management much easier. Native install is lightweight but less flexible for production.
Do I need a GPU for TensorFlow Serving?
No. TensorFlow Serving works fine on CPU, especially for smaller models or low-traffic environments. GPU is recommended only for large-scale inference or very deep models.
Can I use TensorFlow Serving with non-TensorFlow models?
Yes. TensorFlow Serving can also serve models converted to TensorFlow SavedModel format.
Conclusion
Deploying TensorFlow Serving on dedicated servers gives you complete control over performance, scalability, and security. With these steps, your machine learning models can be deployed in a production-grade environment that is stable, secure, and ready to handle real-world workloads.
If you’re hosting on PerLod Hosting, you’ll benefit from the reliability, dedicated resources, and scalability required to serve AI models with confidence.
We hope you enjoy this guide. Subscribe to X and Facebook channels to get the latest updates and articles.
For further reading:
Full setup guide for OSSEC and Fail2Ban on Linux Server
