
OpenSearch Cluster Setup Ubuntu 24.04
OpenSearch is an open-source analytics tool that allows you to store, search, and analyze large data. It is often used for apps like real-time monitoring, log analysis, and website search. OpenSearch is a fork of the Elasticsearch and Kibana projects created by Amazon. It can operate as a single-node or multi-node cluster. An OpenSearch cluster is a group of nodes that work together to store and share data. This tutorial provides step-by-step instructions for OpenSearch Cluster Setup Ubuntu 24.04, including installing OpenSearch and configuring OpenSearch clusters (multi-node setup).
Note: In this guide, we will use demo certificates. Demo certificates are only for lab environments; in production, always use a proper CA and valid certificates. Remember to change the default ‘admin’ password immediately and create separate roles/users. Also, increase the heap size according to your available RAM (e.g., 4–8GB). Configure Snapshot/Backup to use S3/Wasabi/MinIO.
For external access, open the necessary ports on the firewall and expose the service publicly using an Nginx/Reverse Proxy with a valid TLS certificate.
What You Will Learn
Step-by-Step OpenSearch Cluster Setup Ubuntu 24.04
Here, we assume you have three Ubuntu 24.04 servers (nodes) with separate IP addresses, including:
- Node1: node1-ip
- Node2: node2-ip
- Node3: node3-ip
What you must do:
- Install OpenSearch on all three nodes.
- Configure System settings on all three nodes.
- Configure the /etc/opensearch/opensearch.yml file on each node with the shared parameters and IP of each node with the Security Plugin.
- Setting memlock and kernel parameters.
- Activate the service and test the cluster status.
- Install OpenSearch Dashboards on one of the nodes.
Step 1. Installing OpenSearch
The first step is to install OpenSearch on all three servers (nodes). Run the system update and install required packages with the following commands:
sudo apt update -y
sudo apt install curl gnupg apt-transport-https -y
Add the OpenSearch GPG Key and Repository to your server with the following commands:
sudo install -m 0755 -d /usr/share/keyrings

curl -fsSL https://artifacts.opensearch.org/publickeys/opensearch.pgp | sudo gpg --dearmor -o /usr/share/keyrings/opensearch-keyring.gpg

echo "deb [signed-by=/usr/share/keyrings/opensearch-keyring.gpg] https://artifacts.opensearch.org/releases/bundle/opensearch/2.x/apt stable main" | sudo tee /etc/apt/sources.list.d/opensearch-2.x.list
Run the system update:
sudo apt updateBecause of the demo config issue in Ubuntu 24, we will first download and modify the OpenSearch package with the following commands:
sudo apt download opensearch
sudo dpkg-deb -x opensearch_*_amd64.deb opensearch-tmp
sudo dpkg-deb --control opensearch_*_amd64.deb opensearch-tmp/DEBIAN
sudo rm opensearch-tmp/DEBIAN/postinst
sudo dpkg -b opensearch-tmp opensearch-fixed.deb
Once you are done, use the command below to install OpenSearch:
sudo dpkg -i opensearch-fixed.debStep 2. Configuring System Settings
At this step, you must set the kernel requirements, disable swap, and enable memlock on all three nodes. On each node, you must run the commands below:
Setting up the kernel requirements:
echo "vm.max_map_count=262144" | sudo tee /etc/sysctl.d/99-opensearch.conf
sudo sysctl --system
Disabling swap:
sudo swapoff -a
sudo sed -ri '/\s+swap\s+/s/^/#/' /etc/fstab
Enabling memlock:
sudo mkdir -p /etc/systemd/system/opensearch.service.d
sudo bash -c 'cat > /etc/systemd/system/opensearch.service.d/override.conf <<EOF
[Service]
LimitMEMLOCK=infinity
EOF'
Reloading system daemon:
sudo systemctl daemon-reloadStep 3. Configure JVM Settings
On all three nodes, you must reduce the Heap to 512 by using the following command:
sudo sed -i 's/^-Xms.*/-Xms512m/; s/^-Xmx.*/-Xmx512m/' /etc/opensearch/jvm.optionsThen, remove the GC log path to the file with the command below:
sudo sed -i 's|file=/var/log/opensearch/gc.log:utctime,pid,tags:filecount=32,filesize=64m|utctime,pid,tags|g' /etc/opensearch/jvm.optionsStep 4. Set up Config file and Ownership
First, you must ensure the config path exists on all three nodes:
sudo install -d -o opensearch -g opensearch -m 0755 /etc/opensearchThen, create a basic config file on all nodes without discovery, which will be completed in the next steps:
sudo bash -c 'cat > /etc/opensearch/opensearch.yml <<EOF
cluster.name: opensearch-cluster
EOF'
Set up the log and data paths and ownership on all nodes:
sudo install -o opensearch -g opensearch -m 0750 -d /usr/share/opensearch/logs
sudo chown -R opensearch:opensearch /etc/opensearch /var/lib/opensearch /usr/share/opensearch /var/log/opensearch || true
Step 5. Install and Apply Demo Security
In this step, you can prepare the demo certificates (root-ca.pem, esnode.pem, esnode-key.pem, kirk.pem, kirk-key.pem) and security configuration for all nodes.
First, create a strong admin password:
export OPENSEARCH_INITIAL_ADMIN_PASSWORD='StrongPassword'Then, run the demo script with the correct config path:
cd /usr/share/opensearch

sudo -E OPENSEARCH_PATH_CONF=/etc/opensearch ./plugins/opensearch-security/tools/install_demo_configuration.sh -y
If you get a success message, the following files should be in /etc/opensearch/: root-ca.pem, esnode.pem, esnode-key.pem, kirk.pem, kirk-key.pem, and the /opensearch-security directory.
Step 6. Setting up OpenSearch yml file on Each Node
At this point, you must edit the opensearch.yml file on each node and change the settings with your values:
In server 1 (Node 1), run the command below. Remember to replace the node-ip with your server’s IP:
sudo bash -c 'cat > /etc/opensearch/opensearch.yml <<EOF
cluster.name: opensearch-cluster
node.name: node-1
network.host: 0.0.0.0

discovery.seed_hosts: ["node1-ip","node2-ip","node3-ip"]
cluster.initial_master_nodes: ["node-1","node-2","node-3"]

bootstrap.memory_lock: true

######## Security Demo (We keep demo certificates for the lab.)
plugins.security.ssl.transport.pemcert_filepath: esnode.pem
plugins.security.ssl.transport.pemkey_filepath: esnode-key.pem
plugins.security.ssl.transport.pemtrustedcas_filepath: root-ca.pem
plugins.security.ssl.transport.enforce_hostname_verification: false

plugins.security.ssl.http.enabled: true
plugins.security.ssl.http.pemcert_filepath: esnode.pem
plugins.security.ssl.http.pemkey_filepath: esnode-key.pem
plugins.security.ssl.http.pemtrustedcas_filepath: root-ca.pem

plugins.security.allow_unsafe_democertificates: true
plugins.security.authcz.admin_dn: ['CN=kirk,OU=client,O=client,L=test,C=de']

node.max_local_storage_nodes: 3
EOF'Note: For node2 and node3, just change the node.name value (node-2, node-3).
Step 7. Start and Enable OpenSearch
On each node, start and enable OpenSearch with the command below:
sudo systemctl enable --now opensearchVerify your service is active and running:
sudo systemctl status opensearch --no-pager -lStep 8. OpenSearch Security Initialization for One Node
For example, on node1, you must navigate to the following path:
cd /usr/share/opensearch/plugins/opensearch-security/toolsThen, use the JDK bundle and config path for Security Initialization:
sudo -E OPENSEARCH_PATH_CONF=/etc/opensearch OPENSEARCH_JAVA_HOME=/usr/share/opensearch/jdk \
./securityadmin.sh \
  -cd /etc/opensearch/opensearch-security \
  -h 127.0.0.1 -p 9200 \
  -cacert /etc/opensearch/root-ca.pem \
  -cert   /etc/opensearch/kirk.pem \
  -key    /etc/opensearch/kirk-key.pem \
  -icl -nhnv
You should see a successful output of creating/updating 10 configs.
Step 9. Test the OpenSearch cluster status
From Node1, you can test the cluster status. To do this, use the following curl commands. Replace with the password you chose in step 5:
PASS='StrongPassword'

curl -k -u admin:"$PASS" https://127.0.0.1:9200/
curl -k -u admin:"$PASS" https://127.0.0.1:9200/_cluster/health?pretty
curl -k -u admin:"$PASS" "https://127.0.0.1:9200/_cat/nodes?v"
In the output, you must see 3 nodes with green or yellow status.
Step 10. Install and Access OpenSearch Dashboards
To access the OpenSearch Web UI dashboard, you can install the OpenSearch dashboard on one of your nodes. For example, on your node 1, run the commands below:
echo "deb [signed-by=/usr/share/keyrings/opensearch-keyring.gpg] https://artifacts.opensearch.org/releases/bundle/opensearch-dashboards/2.x/apt stable main" \
  | sudo tee /etc/apt/sources.list.d/opensearch-dashboards-2.x.list

sudo apt update
sudo apt install -y opensearch-dashboards
Then, you must edit the opensearch_dashboards.yml file as shown below:
sudo bash -c 'cat > /etc/opensearch-dashboards/opensearch_dashboards.yml <<EOF
server.host: "0.0.0.0"
opensearch.hosts: ["https://127.0.0.1:9200"]
opensearch.ssl.verificationMode: none
opensearch.username: "admin"
opensearch.password: "'"$PASS"'"
EOF'
Next, enable the OpenSearch Dashboards service:
sudo systemctl enable --now opensearch-dashboardsTo access the OpenSearch dashboard, use your desired web browser and navigate to the following URL:
http://node1-ip:5601Login credentials:
opensearch.username: admin
opensearch.password: $pass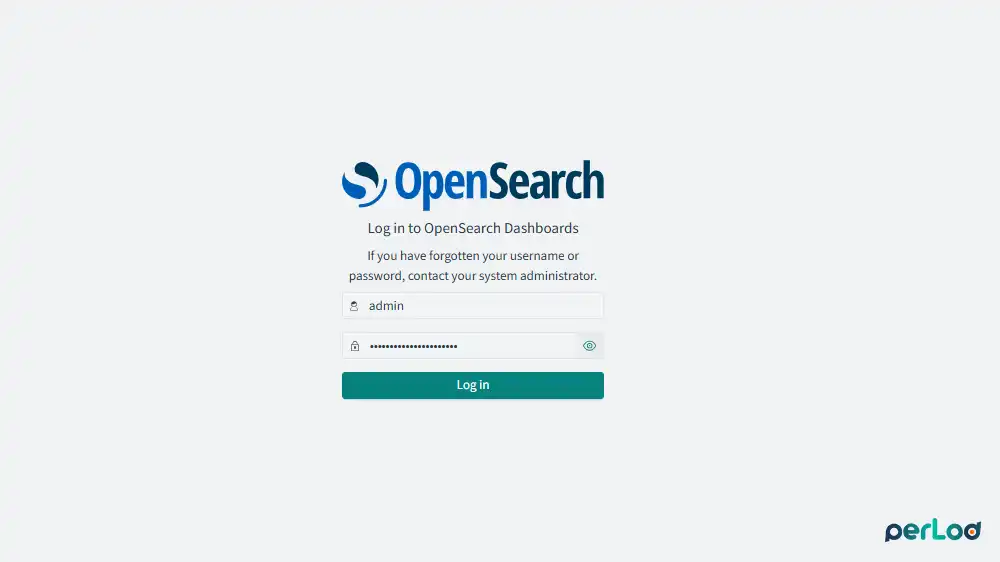


Final Words
Now you have completed the OpenSearch Cluster Setup Ubuntu 24.04. By following the guide steps carefully, you can easily set up an OpenSearch cluster with three nodes on Ubuntu 24.04. You just keep in mind that we use Demo certificates. For production environments, you must use valid certificates and open the necessary ports on the firewall.
We hope you enjoy this step-by-step guide. Stay updated with the latest tips and guides. Subscribe to our Facebook and X channels to get expert advice, special offers, and helpful guides delivered straight to you!
You can also purchase dedicated servers from our site and enjoy reliable, secure, and cost-effective hosting tailored for your business.
