Proxy API Requests Without Changing Code Using Nginx and /etc/hosts
Proxy API without code change is a critical solution when your application needs to connect to an external API, but the provider blocks your server location or only allows specific IP addresses. This is common with domain registrars, payment gateways, fraud detection tools, and many SaaS platforms.
If your system is in production, changing the code is risky and may break existing integrations. WHMCS environments often use encoded modules that cannot be modified without affecting updates. In this guide from PerLod Hosting, you will learn a solution that allows you to route requests for a specific domain through a trusted proxy server without changing a single line of code. The method is stable, transparent to your application, and easy to roll back.
Instead of modifying the software, we modify the network resolution and build a secure reverse proxy layer. Your application continues to call the same domain; however, the request is routed through a proxy server that is already whitelisted by the external provider.
Table of Contents
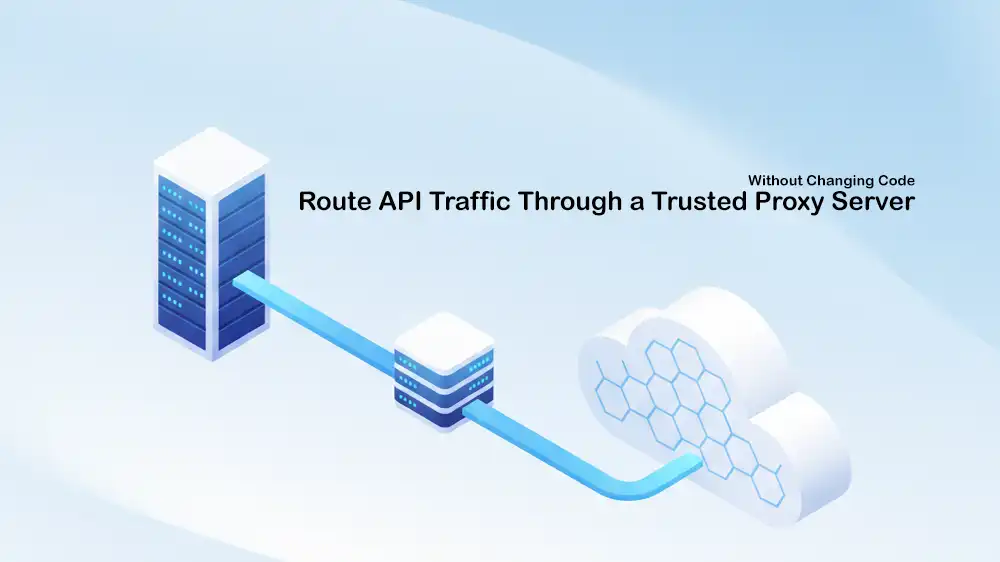
Nginx Reverse Proxy Architecture for a Single Domain
This method is ideal for WHMCS or any encoded PHP app, production SaaS systems, and APIs that only allow certain IP addresses, including endpoints protected by Cloudflare, WAF, or limited by region or compliance rules.
On your origin server, you map the API domain to your proxy server’s IP using /etc/hosts, then the proxy server uses Nginx to forward requests to the real API, so the provider only sees the proxy IP.
Because the proxy uses the same domain name and matching SSL identity, your application continues to work normally without any code changes.
Now that you have understood the architecture, proceed to the next steps to start the implementation.
Implementation of Proxy API without Code Change
At this point, you can follow these steps to set up Proxy API without code change. You must configure the proxy server and adjust the origin server to route traffic through it.
The entire process takes about 15 to 20 minutes and requires no application downtime.
Step 1. Prepare Proxy Server
You must obtain a VPS hosting server in a trusted location, such as Finland, Germany, or the Netherlands, and ensure that the API provider whitelists its IP address.
We assume that your VPS is running Ubuntu OS. Run the system update and install Nginx with the commands below:
sudo apt update && sudo apt install -y nginxStep 2. Create a self-signed Certificate
Now you must create a certificate that matches the real API domain so your application will trust the connection.
Create the directory and generate the certificate with the commands below:
Remember to replace TARGET_DOMAIN with the real API domain.
sudo mkdir -p /etc/nginx/ssl

sudo openssl req -x509 -nodes -days 3650 -newkey rsa:2048 \
  -keyout /etc/nginx/ssl/TARGET_DOMAIN-proxy.key \
  -out /etc/nginx/ssl/TARGET_DOMAIN-proxy.crt \
  -subj "/CN=TARGET_DOMAIN"
Step 3. Build a Nginx Reverse Proxy
You must create the Nginx site configuration for setting up the proxy API without code change. To do this, you can use the command below:
Just replace the TARGET_DOMAIN and ORIGIN_SERVER_IP with your real values.
sudo tee /etc/nginx/sites-available/TARGET_DOMAIN-proxy >/dev/null <<'EOF'
log_format proxy_timing '$remote_addr - $remote_user [$time_local] '
                        '"$request" $status $body_bytes_sent '
                        'rt=$request_time urt=$upstream_response_time '
                        'uaddr=$upstream_addr '
                        '"$http_referer" "$http_user_agent"';

server {
    listen 443 ssl;
    server_name TARGET_DOMAIN;

    allow ORIGIN_SERVER_IP;
    deny all;

    ssl_certificate     /etc/nginx/ssl/TARGET_DOMAIN-proxy.crt;
    ssl_certificate_key /etc/nginx/ssl/TARGET_DOMAIN-proxy.key;

    access_log /var/log/nginx/TARGET_DOMAIN-access.log proxy_timing;
    error_log  /var/log/nginx/TARGET_DOMAIN-error.log warn;

    location / {
        proxy_pass https://TARGET_DOMAIN;
        proxy_ssl_server_name on;
        proxy_set_header Host TARGET_DOMAIN;

        proxy_http_version 1.1;
        proxy_set_header Connection "";

        proxy_connect_timeout 60;
        proxy_send_timeout 180;
        proxy_read_timeout 180;
        send_timeout 180;

        proxy_buffering off;
        proxy_request_buffering off;
    }
}
EOF
Once you are done, save and close the file. Enable the configuration, check for any syntax errors, and restart Nginx to apply the changes:
sudo ln -sf /etc/nginx/sites-available/TARGET_DOMAIN-proxy /etc/nginx/sites-enabled/TARGET_DOMAIN-proxy
sudo nginx -t && sudo systemctl restart nginx
Step 4. Configure Firewall and Security
In this step, you must restrict access so that only your origin server can connect to the proxy. To do this, you can use the commands below:
sudo ufw allow from ORIGIN_SERVER_IP to any port 443 proto tcp
sudo ufw deny 443/tcp
sudo ufw enable
Step 5. Trust Proxy Certificate on Origin Server
Export the certificate from the proxy server with the following command:
sudo base64 -w0 /etc/nginx/ssl/TARGET_DOMAIN-proxy.crtThen, on the origin server, place the certificate and update trust, use BASE64_CERT as shown below:
sudo mkdir -p /etc/pki/ca-trust/source/anchors

echo 'BASE64_CERT' | base64 -d | sudo tee /etc/pki/ca-trust/source/anchors/TARGET_DOMAIN-proxy.crt

sudo update-ca-trust extract
Step 6. Override DNS Resolution
Here, you must override the resolution so that your origin server routes the target domain to the proxy IP using /etc/hosts. To do this, you can run:
echo 'PROXY_SERVER_IP TARGET_DOMAIN' | sudo tee -a /etc/hostsWith this, your application will automatically route traffic through the proxy.
Step 7. Confirm API Routing Without Code Change
To verify Proxy API without code change, you can use the following curl command:
curl https://TARGET_DOMAIN/api/testIf the API responds correctly, the setup is complete.
Production Tips for Proxy API Requests Without Changing Code
You can monitor traffic in real time by tailing the access log:
sudo tail -f /var/log/nginx/TARGET_DOMAIN-access.logThe request_time shows the total time taken, while upstream_response_time tells you how fast the API is responding. Quick 500 errors usually mean there is an issue with parameters or login details, and slow responses from the upstream server often mean you are being throttled.
In production, create a separate virtual host for each API you proxy and always restrict access by IP address. You should also monitor your logs regularly, use multiple proxy servers for backup, and set up health checks with alerts.
This design can scale to multiple domains, multiple origin servers, multi-region SaaS deployments, and high-availability setups, including multiple proxy nodes behind DNS load balancing.
For the rollback, if the provider whitelists your original IP, remove the /etc/hosts entry, and the system returns to normal.
FAQs
Can I proxy a single domain for multiple APIs?
Yes. You can use this nginx reverse proxy for api setup to handle multiple domains by creating separate server blocks for each one.
Is Proxy API, without any code change, safe for WHMCS environments?
Absolutely. This WHMCS API proxy solution is designed for environments where core files are encoded, and you cannot modify the source code.
How do I bypass IP restrictions if the provider blocks my server?
By using this method to route traffic through a proxy server, the provider sees the allowed IP of your proxy instead of your blocked origin server IP.
Conclusion
This guide showed you how to route API traffic through a trusted proxy server without changing any code. By using Nginx and the /etc/hosts file, you can bypass IP restrictions and regional blocks safely, even in production environments like WHMCS.
This method gives you a stable and secure way to connect to restricted APIs that is easy to remove if needed.
We hope you enjoy this guide. Subscribe to our X and Facebook channels to get the latest updates and articles on troubleshooting tips.
