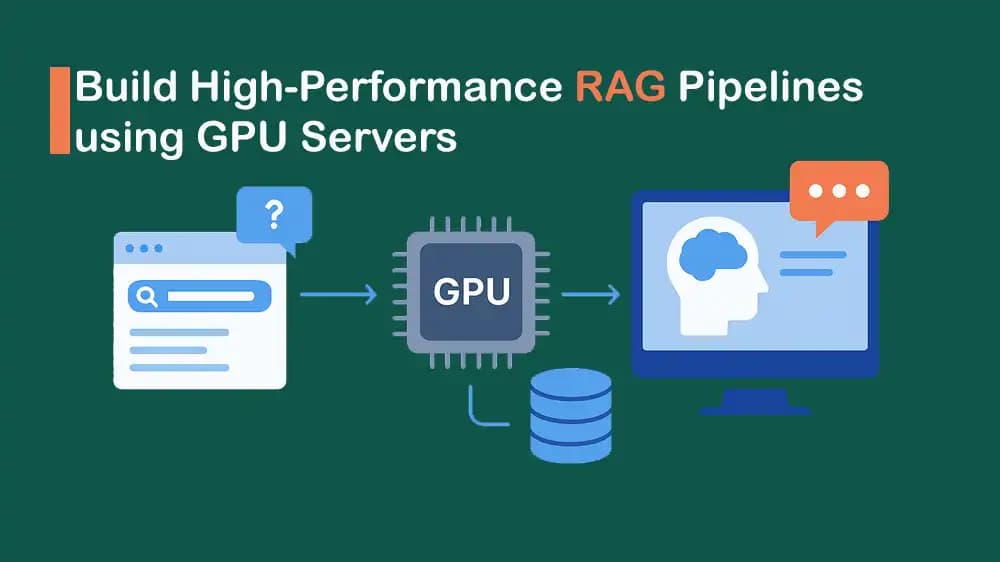
Building smart AI systems often starts with Retrieval-Augmented Generation (RAG). But as your data grows and your users expect faster answers, a basic RAG setup is no longer enough. This is where GPU-powered embeddings and model serving make a big difference. In this guide, you will learn to build RAG Pipelines using GPU Servers.
By moving heavy tasks like generating embeddings and running large language models onto GPUs, you can speed up response times, handle larger workloads, and get much better accuracy.
For developers and companies looking for reliable hardware, PerLod Hosting offers the best GPs, which are optimized for AI workloads.
Building RAG Pipelines Using GPU Servers
In this guide, we assume you are running Ubuntu 22.04 or 24.04 on a server that has an NVIDIA GPU.
Our goal is to build a self-hosted RAG system that takes full advantage of the GPU Dedicated Server, which means running embeddings on the GPU, running the LLM on the GPU, and using a vector database (Qdrant) to store and retrieve documents.
Here are the three main parts we want to use:
- Use Hugging Face’s Text Embeddings Inference (TEI) to create embeddings on the GPU.
- Serve the large language model using vLLM, which gives us an OpenAI-compatible API and very fast GPU inference.
- Store the vectors in Qdrant and access them through its Python client.
This setup gives you a fast, flexible, and fully self-hosted RAG system that takes full advantage of your GPU hardware.
Prerequisites for Setting Up a Fully Self-hosted RAG System
In this setup guide, we want to configure the Ubuntu server to run GPU-accelerated applications within Docker containers. You can easily create a robust environment that enables containerized software to access and utilize your GPU resources.
You must install NVIDIA drivers and CUDA by using the official docs or your cloud provider image. Just remember that the driver version must be compatible with CUDA 12.2+ because TEI images are built around that.
To verify your GPU model and driver, you can run the command below:
Install Docker on your server by using the following commands:
sudo apt updatesudo apt install ca-certificates curl gnupg -y sudo install -m 0755 -d /etc/apt/keyringscurl -fsSL https://download.docker.com/linux/ubuntu/gpg \ | sudo gpg --dearmor -o /etc/apt/keyrings/docker.gpg echo \ "deb [arch=$(dpkg --print-architecture) \ signed-by=/etc/apt/keyrings/docker.gpg] \ https://download.docker.com/linux/ubuntu \ $(lsb_release -cs) stable" \| sudo tee /etc/apt/sources.list.d/docker.list >/dev/null sudo apt updatesudo apt install docker-ce docker-ce-cli containerd.io -ysudo usermod -aG docker $USER
To apply that your user is in the Docker group, log out and log in again.
To set up the NVIDIA container toolkit, you can run the commands below:
distribution=$(. /etc/os-release;echo $ID$VERSION_ID) curl -fsSL https://nvidia.github.io/libnvidia-container/gpgkey \ | sudo gpg --dearmor -o /usr/share/keyrings/nvidia-container-toolkit-keyring.gpg curl -s -L https://nvidia.github.io/libnvidia-container/$distribution/libnvidia-container.list \ | sed 's#deb https://#deb [signed-by=/usr/share/keyrings/nvidia-container-toolkit-keyring.gpg] https://#g' \ | sudo tee /etc/apt/sources.list.d/nvidia-container-toolkit.list sudo apt updatesudo apt install nvidia-container-toolkit -y sudo nvidia-ctk runtime configure --runtime=dockersudo systemctl restart docker
To confirm everything is working correctly, run nvidia-smi from inside a container:
docker run --rm --gpus all nvidia/cuda:12.2.0-base-ubuntu22.04 nvidia-smi
Deploy a GPU-Powered Embedding Service with Text Embedding Inference (TEI)
Once your server is configured with the necessary GPU and Docker tools, you can deploy a high-performance service for generating text embeddings.
In this step, we want to launch Hugging Face's Text Embeddings Inference (TEI) server, which is a specialized tool designed for fast and efficient batch embedding generation on GPU hardware.
The first step is to choose the model and create the model directory. We use the popular BAAI/bge-large-en-v1.5 model.
Create a project directory and navigate to it with the commands below:
sudo mkdir -p ~/tei_datacd ~/tei_data
Choose the model and create the directory with the commands below:
export TEI_MODEL="BAAI/bge-large-en-v1.5"export TEI_VOLUME="$PWD/data"mkdir -p "$TEI_VOLUME"
Then, containerize it with Docker, and expose it as a web service on port 8080 with the command below:
docker run --gpus all \ -p 8080:80 \ -v "$TEI_VOLUME":/data \ --pull always \ ghcr.io/huggingface/text-embeddings-inference:1.8 \ --model-id "$TEI_MODEL"
The first run will download model weights into /data to avoid re-download.
Once it is running, you can send text to its API endpoint and receive back embeddings, which are the fundamental building blocks for RAG. To do this, you can run the command below:
sudo curl 127.0.0.1:8080/embed \ -X POST \ -H "Content-Type: application/json" \ -d '{"inputs":"What is Retrieval Augmented Generation?"}'
You should receive a JSON response that includes an array of numbers called embeddings.
Deploy a High-Performance GPU LLM Server with vLLM
The next essential component of a RAG backend is a high-performance Large Language Model (LLM) server. We want to deploy vLLM, which is a powerful inference engine known for its efficiency and OpenAI-compatible API.
You can easily create an isolated Python environment, install vLLM, and launch a server that provides standard OpenAI endpoints like /v1/chat/completions.
Set up the Python environment with the commands below:
sudo mkdir -p ~/rag_llm && cd ~/rag_llmpython3 -m venv .venvsource .venv/bin/activate pip install --upgrade pippip install "vllm[all]"
You must choose a model that fits your GPU; for a 24 GB GPU, you can often run a 7B instruct model; for smaller VRAM, pick a smaller model.
For example, we deploy vLLM to serve the Qwen/Qwen3-8B model on port 8001 with the command below:
vllm serve Qwen/Qwen3-8B \ --port 8001 \ --host 0.0.0.0
This downloads the model from Hugging Face on the first run and starts the server at http://0.0.0.0:8001/v1.
Now, verify the LLM server with the following curl command:
curl http://127.0.0.1:8001/v1/chat/completions \ -H "Content-Type: application/json" \ -d '{ "model": "Qwen/Qwen3-8B", "messages": [ {"role":"user","content":"Say hello from a PerLod GPU optimized RAG backend."} ], "max_tokens": 128 }'
You should see a JSON response with a choices array containing the model output.
Start Qdrant Vector Database
At this point, you need a dedicated database to store and query the vector embeddings generated by the TEI server. We want to use Qdrant, which is a high-performance and production-ready vector database.
Qdrant acts as the long-term memory for your application, efficiently storing vector embeddings and enabling lightning-fast similarity searches. When a user asks a question, the RAG pipeline will query Qdrant to find the most relevant information before the LLM generates a final answer.
Run Qdrant vector database in Docker with a persistent volume to ensure your data survives when the container restarts:
sudo mkdir -p ~/qdrant_storage docker run -p 6333:6333 -p 6334:6334 \ -v "$HOME/qdrant_storage:/qdrant/storage:z" \ qdrant/qdrant
- REST API is available at:
http://localhost:6333
- The Web Dashboard is at:
http://localhost:6333/dashboard
- gRPC is available at:
localhost:6334
Build the RAG System with Python: Ingestion and Query
In this step, you must make the services work together. You can create a RAG system with a Python service for the entire workflow.
Create the RAG Ingestion Service
This Python service will ingest your documents by chunking and embedding them with the TEI server, store the results in Qdrant, and then answer questions by retrieving relevant context and generating responses with the vLLM LLM server.
You must install the libraries inside the ~/rag_llm venv you have created, or you can create a separate env on your choice:
cd ~/rag_llmsource .venv/bin/activate pip install qdrant-client httpx fastapi uvicorn tiktokenpip install openai
Here we use the ~/rag_llm directory as the project directory. Create a basic configuration file with the command below:
Add the following configuration to the file:
12TEI_URL = "http://127.0.0.1:8080" 3QDRANT_URL = "http://127.0.0.1:6333" 4QDRANT_COLLECTION = "rag_docs"5 6VLLM_BASE_URL = "http://127.0.0.1:8001/v1" 7VLLM_MODEL = "Qwen/Qwen3-8B"8 9EMBEDDING_DIM = 1024 10TOP_K = 511CHUNK_SIZE = 51212CHUNK_OVERLAP = 64
Note: Check the embedding size on the model’s page. For example, BGE Large often uses 1024, but you should confirm this on Hugging Face.
Then, create a chunking file with the command below:
nano ~/rag_llm/chunking.py
Add the following chunking configuration to the file:
12from typing import List3 4def simple_chunk(text: str, chunk_size: int = 512, overlap: int = 64) -> List[str]:5 """Simple word based chunking."""6 words = text.split()7 if not words:8 return []9 10 chunks = []11 start = 012 while start < len(words):13 end = min(len(words), start + chunk_size)14 chunk = " ".join(words[start:end])15 chunks.append(chunk)16 if end == len(words):17 break18 start = end - overlap19 return chunks
Now you must create the Clients' wrappers, including TEI, Qdrant, and LLM:
nano ~/rag_llm/clients.py
Add the following configuration to the file:
12import httpx3from typing import List, Dict, Any4from qdrant_client import QdrantClient, models5from openai import OpenAI6 7from config import TEI_URL, QDRANT_URL, QDRANT_COLLECTION, EMBEDDING_DIM, VLLM_BASE_URL8 9class EmbeddingClient:10 def __init__(self, base_url: str = TEI_URL):11 self.base_url = base_url.rstrip("/")12 13 async def embed(self, texts: List[str]) -> List[List[float]]:14 async with httpx.AsyncClient(timeout=60.0) as client:15 response = await client.post(16 f"{self.base_url}/embed",17 json={"inputs": texts},18 )19 response.raise_for_status()20 data = response.json()21 22 return data["embeddings"]23 24class QdrantVectorStore:25 def __init__(self, url: str = QDRANT_URL, collection: str = QDRANT_COLLECTION):26 self.collection = collection27 self.client = QdrantClient(url=url)28 29 def ensure_collection(self, dim: int):30 if not self.client.collection_exists(self.collection):31 self.client.create_collection(32 collection_name=self.collection,33 vectors_config=models.VectorParams(34 size=dim,35 distance=models.Distance.COSINE36 ),37 )38 39 def upsert_points(self, vectors: List[List[float]], payloads: List[Dict[str, Any]]):40 assert len(vectors) == len(payloads)41 points = [42 models.PointStruct(43 id=i,44 vector=v,45 payload=payloads[i],46 )47 for i, v in enumerate(vectors)48 ]49 self.client.upsert(50 collection_name=self.collection,51 wait=True,52 points=points,53 )54 55 def search(self, query_vector: List[float], top_k: int = 5):56 result = self.client.query_points(57 collection_name=self.collection,58 query=query_vector,59 limit=top_k,60 )61 return result62 63class LLMClient:64 def __init__(self, base_url: str = VLLM_BASE_URL, api_key: str = "EMPTY"):65 66 self.client = OpenAI(67 api_key=api_key,68 base_url=base_url,69 )70 71 def chat(self, model: str, messages: List[Dict[str, str]], max_tokens: int = 512):72 response = self.client.chat.completions.create(73 model=model,74 messages=messages,75 max_tokens=max_tokens,76 )77 return response.choices[0].message.content
Note: The Qdrant client code follows the official examples, using VectorParams for setting up the collection and query_points for searching.
Finally, create the ingestion script file with the following command:
Add the following script to the file:
12import asyncio3from pathlib import Path4from typing import List5 6from config import EMBEDDING_DIM, QDRANT_COLLECTION, TOP_K, CHUNK_SIZE, CHUNK_OVERLAP7from chunking import simple_chunk8from clients import EmbeddingClient, QdrantVectorStore9 10DOCS_DIR = Path("./documents")11 12async def ingest_directory():13 emb_client = EmbeddingClient()14 store = QdrantVectorStore()15 16 store.ensure_collection(EMBEDDING_DIM)17 18 all_chunks: List[str] = []19 payloads = []20 21 for path in DOCS_DIR.glob("*.txt"):22 text = path.read_text(encoding="utf8", errors="ignore")23 chunks = simple_chunk(text, CHUNK_SIZE, CHUNK_OVERLAP)24 for idx, chunk in enumerate(chunks):25 all_chunks.append(chunk)26 payloads.append(27 {28 "source": str(path.name),29 "chunk_index": idx,30 "text": chunk,31 }32 )33 34 35 batch_size = 6436 vectors: List[List[float]] = []37 for i in range(0, len(all_chunks), batch_size):38 batch = all_chunks[i : i + batch_size]39 batch_vectors = await emb_client.embed(batch)40 vectors.extend(batch_vectors)41 42 store.upsert_points(vectors, payloads)43 44 print(f"Ingested {len(all_chunks)} chunks into collection '{QDRANT_COLLECTION}'.")45 46if __name__ == "__main__":47 asyncio.run(ingest_directory())
Place your .txt files inside the ./documents folder:
mkdir -p ~/rag_llm/documents
Now you can run the ingestion with the command below:
cd ~/rag_llmpython ingest.py
This script will:
- Make sure the Qdrant collection exists with the correct vector size.
- Split your documents into chunks and create embeddings using TEI.
- Save the vectors and metadata into Qdrant.
Create the RAG Query Service
To make the RAG system accessible to frontend applications and other services, you need a standardized interface. You can create a FastAPI service that wraps the entire RAG pipeline into a clean HTTP endpoint.
Create the RAG query API file with the command below:
nano ~/rag_llm/rag_api.py
Add the following configuration to create a /rag/query endpoint that takes a question and returns an answer with supporting context:
12from typing import List3 4from fastapi import FastAPI5from pydantic import BaseModel6 7from config import TOP_K, VLLM_MODEL8from clients import EmbeddingClient, QdrantVectorStore, LLMClient9 10app = FastAPI()11 12emb_client = EmbeddingClient()13store = QdrantVectorStore()14llm_client = LLMClient()15 16class QueryRequest(BaseModel):17 question: str18 top_k: int | None = None19 20class QueryResponse(BaseModel):21 answer: str22 context: List[str]23 24@app.post("/rag/query", response_model=QueryResponse)25async def rag_query(req: QueryRequest):26 top_k = req.top_k or TOP_K27 28 29 vectors = await emb_client.embed([req.question])30 query_vec = vectors[0]31 32 33 result = store.search(query_vec, top_k=top_k)34 35 context_chunks = []36 for hit in result:37 payload = hit.payload or {}38 context_chunks.append(payload.get("text", ""))39 40 context_text = "\n\n".join(41 f"- {chunk}" for chunk in context_chunks if chunk.strip()42 )43 44 45 system_prompt = (46 "You are a helpful assistant that answers using the provided context.\n"47 "If the context does not contain the answer, say you are not sure.\n"48 )49 50 user_prompt = (51 f"Context:\n{context_text}\n\n"52 f"Question: {req.question}\n\n"53 "Answer in a concise and accurate way based only on the context."54 )55 56 57 answer = llm_client.chat(58 model=VLLM_MODEL,59 messages=[60 {"role": "system", "content": system_prompt},61 {"role": "user", "content": user_prompt},62 ],63 max_tokens=512,64 )65 66 return QueryResponse(answer=answer, context=context_chunks)
Run the API with the following command:
uvicorn rag_api:app --host 0.0.0.0 --port 9000
You can test it with the following curl command:
curl http://127.0.0.1:9000/rag/query \ -H "Content-Type: application/json" \ -d '{"question": "What is this project about?"}'
You should get JSON with the answer and the context array.
Conclusion
Building a Retrieval-Augmented Generation (RAG) system with GPU-accelerated embeddings and model serving gives you the best combination of speed, accuracy, and scalability.
By using Hugging Face TEI for embeddings, vLLM for high-speed LLM serving, and Qdrant for vector search, you can create a modern, production-ready system that handles real workloads efficiently.
This RAG Pipelines Using GPU Servers Setup allows you to:
- Quickly ingest large knowledge bases.
- Get fast, low-latency LLM responses.
- Make full use of your GPU resources.
- Build a flexible and extendable retrieval pipeline.
We hope you enjoy this guide. Subscribe to our X and Facebook channels to get the latest updates and articles on GPU hosting.
For further reading:
Explore GPU Hosting Alternatives to AWS for AI Training