Zero Trust VPS Hosting Tutorial
As you must know, in today’s digital world, traditional security models are no longer enough for protecting VPS from cyber threats. Because of this, businesses are going for another solution to keep their infrastructure and data safe. Implementing Zero Trust principles offers a powerful framework for strengthening VPS hosting security. Here, we intend to teach you a Zero Trust VPS Hosting tutorial.
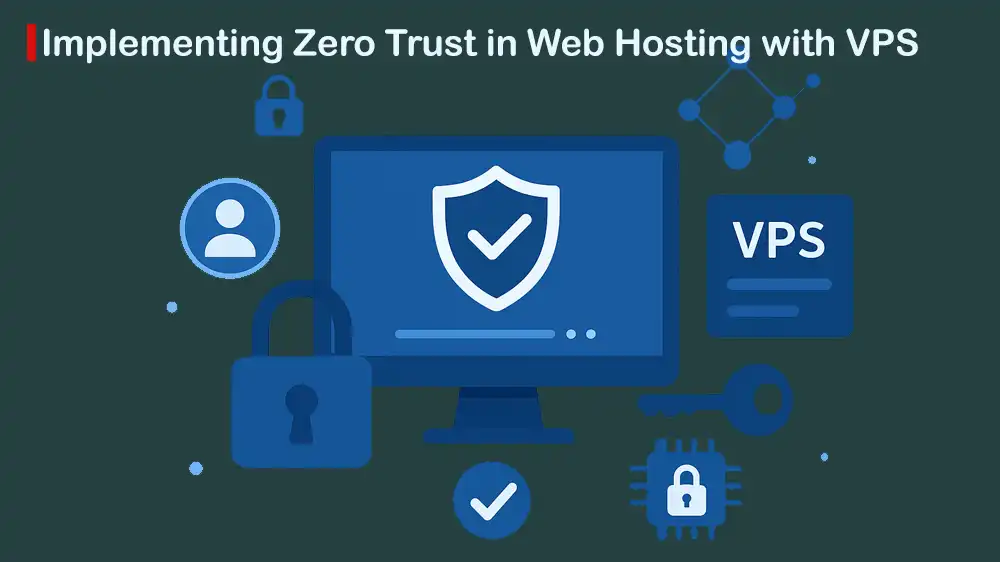
Zero Trust reduces the risk of unauthorized access and ensures that every interaction within the system is secure by continuously validating users, devices, and network activities.
If you are looking for a secure and reliable VPS solution, PerLod Hosting offers the best plans with modern Zero Trust principles.
Now proceed to the rest of the article to harden a VPS Hosting environment with Zero Trust.
Table of Contents
What Does Zero Trust Really Mean?
Zero Trust is a security model that doesn’t automatically trust anyone or anything. Just because a user or device is inside a company’s network doesn’t mean they’re safe. In the Zero Trust model, every action or request must be checked:
- Authenticate: Prove who you are.
- Authorize: Check if you’re allowed to do this specific thing.
- Encrypt: Make sure your connection is secure.
It’s not just a single tool like a firewall; it covers every operation, including users, devices, networks, applications, workloads, and data.
The CISA Zero Trust Maturity Model (version 2.0) helps organizations plan and measure how well they’re adopting these ideas. It’s built around five key areas, including Identity, Devices, Networks, Applications and Workloads, and Data.
Also, it is supported by Visibility and Analytics, Automation and Orchestration, and Governance.
Understand Target VPS Hosting Environment: A Provider’s View
To build a secure VPS hosting platform, you need to understand how all layers of your VPS hosting environment work together. You can think of it as three main layers:
Control Plane: It handles all the management tools and automation.
- Billing and provisioning portals.
- Identity and Access Management (IAM) and Single Sign-On (SSO).
- Policy engine for enforcing rules.
- CI/CD pipelines for safe deployments.
Data Plane: This is where your workloads actually run.
- Hypervisors and host operating systems.
- Tenant VMs or containers.
- Service mesh for inter-service communication.
- Storage systems.
Security Plane: Protects everything using tools like:
- Identity-aware proxies.
- Mutual TLS (mTLS) encryption.
- Endpoint Detection and Response (EDR) agents.
- Secrets management systems.
- Immutable backups.
The goal is to ensure that every access is identity-based, strictly verified, and logged. With these, tenants stay isolated, and administrators have just-in-time, least-privileged access.
Now that you have understood your VPS hosting environment, proceed to the next steps to implement Zero Trust principles for stronger VPS Hosting security.
This tutorial follows trusted security frameworks, NIST SP 800-207 for Zero Trust principles, CISA’s Maturity Model for staged progress, and Google’s BeyondCorp for identity-based access. Each practice aligns with globally recognized cybersecurity guidance.
1. Identity Control for Zero Trust VPS Hosting Architecture
Zero Trust starts with strong identity control. Every user and service must be verified through a trusted Identity Provider (IdP). This ensures that access decisions are based on who you are, not where you are.
First, you must choose and enable an Identity Provider (IdP) with SSO.
You can set up an IdP such as Okta, Keycloak, or Entra ID to manage all user logins through Single Sign-On (SSO). Enforce Multi-Factor Authentication (MFA) with hardware keys (FIDO2) to remove weak passwords and ensure access is independent of network location.
Then, you can use short-lived credentials.
Instead of static passwords or API keys, you can use short-lived tokens or certificates that expire automatically. This limits damage from stolen credentials and makes credential management safer and easier through automation.
2. Admin Access without Implicit Trust for Zero Trust VPS Hosting Architecture
Admins should never get permanent, unrestricted access. Access must always be proven, short-lived, and tied to identity and device security.
2.1. Lock Down SSH with Certificates
Replace passwords with SSH certificates that expire quickly and can be revoked centrally. This keeps admin access secure and easy to audit.
To do this, create a user Certificate Authority (CA) on a secure host with the command below:
ssh-keygen -t ed25519 -f /opt/ssh-ca/ssh_user_ca -C "Org SSH User CA"(Optional) Create a host CA to sign server host keys:
ssh-keygen -t ed25519 -f /opt/ssh-ca/ssh_host_ca -C "Org SSH Host CA"Then, configure servers to trust the CA on all VPS hosts:
# Trust user CA
echo "TrustedUserCAKeys /etc/ssh/ssh_user_ca.pub" | sudo tee -a /etc/ssh/sshd_config

# Lock down auth
sudo sed -i \
  -e 's/^#\?PasswordAuthentication.*/PasswordAuthentication no/' \
  -e 's/^#\?ChallengeResponseAuthentication.*/ChallengeResponseAuthentication no/' \
  -e 's/^#\?PubkeyAuthentication.*/PubkeyAuthentication yes/' \
  /etc/ssh/sshd_config
sudo systemctl restart sshd
Next, sign a user’s key with a short TTL:
ssh-keygen -s /opt/ssh-ca/ssh_user_ca -I admin-user \
-n admin -V +8h -z 101 ~/.ssh/id_ed25519.pub(Optional) Signed host keys for TOFU-less operations: You can add an @cert-authority line in your admin ~/.ssh/known_hosts so clients trust hosts signed by your Host CA.
2.2. Use FIDO2 Hardware Keys for SSH
You can use FIDO2 security keys to store SSH credentials securely. Generate SSH keys that require a physical touch or PIN each time they’re used.
On the admin’s workstation, run:
ssh-keygen -t ed25519-sk -O resident -O verify-required -C "user@admin-fido2"If your OS requires, persist with:
ssh-add -K ~/.ssh/id_ed25519_skDeploy the public key or sign it with your SSH CA as above.
This ensures that even if a laptop is compromised, attackers can’t use your key without the physical device.
2.3. Add Fine-Grained Authorization with OPA
You can integrate Open Policy Agent (OPA) to determine who can log in or run privileged commands based on established policies. This centralizes and simplifies access control. Example policies can verify identity, time, source IP address, and ticket numbers.
You can use the OPA PAM module to define flexible rules like “Admins can SSH only during work hours if they have an open ticket.”
Example Rego policy:
package ssh.authz
default allow = false

allow {
  input.user == "admin"
  input.groups[_] == "platform-admins"
  startswith(input.ticket_id, "INC-")
  time.hour >= 8
  time.hour <= 20
}
This allows controlled, auditable access without editing /etc/sudoers directly.
3. Network Microsegmentation for Zero Trust VPS Hosting Architecture
Don’t let internal traffic be trusted by default. You can use Microsegmentation to isolate workloads so each component can only talk to what it truly needs.
1. In Kubernetes Environments: Use Cilium to create Network policies that restrict traffic between pods. Default to deny all, and explicitly allow only needed paths.
Example policy:
#only allow frontend -> backend on HTTP GET /api
apiVersion: "cilium.io/v2"
kind: CiliumNetworkPolicy
metadata:
  name: allow-frontend-to-backend
spec:
  endpointSelector:
    matchLabels:
      app: backend
  ingress:
  - fromEndpoints:
    - matchLabels:
        app: frontend
    toPorts:
    - ports:
      - port: "80"
        protocol: TCP
      rules:
        http:
        - method: GET
          path: "^/api"
2. In Traditional VM Environments: Use nftables or another firewall to block all ports except the ones each role requires. Manage these rules through automation tools like Ansible.
Example Rule:
cat <<'EOF' | sudo tee /etc/nftables.conf
flush ruleset
table inet filter {
  chain input {
    type filter hook input priority 0;
    ct state established,related accept
    iif lo accept
    ip protocol icmp accept
    tcp dport 22 ip saddr {trusted-ip-address} accept
    counter drop
  }
}
EOF
sudo systemctl enable --now nftables
This accepts only SSH from a trusted IP and blocks everything else by default.
Tip: You can check this guide for detailed information about Microsegmentation in VPS hosting with nftables.
4. Encrypt Every Service-to-Service Connection for Zero Trust VPS Hosting Architecture
At this point, you can encrypt every hop between services, inside clusters, and across servers. With this option, data is never exposed in transit.
1. For Kubernetes clusters using mTLS: Enable mutual TLS (mTLS) through a service mesh like Istio, so every pod-to-pod connection is automatically encrypted and verified.
#Require mTLS for all workloads in the mesh
apiVersion: security.istio.io/v1beta1
kind: PeerAuthentication
metadata:
  name: default
  namespace: istio-system
spec:
  mtls:
    mode: STRICT
This enforces mutual TLS across all workloads, encrypting all in-cluster traffic.
2. Between VMs and Hosts: Use WireGuard or TLS mutual authentication to secure traffic between servers. Short-lived certificates managed by your control plane ensure security stays tight.
5. Use Identity-Aware Proxy Instead of VPNs
Replace VPNs with identity-aware proxies. It checks user identity, device health, and context before granting access to any internal dashboard or API. This ensures even your internal admin panels follow Zero Trust rules.
Identity-aware proxies include Pomerium, Traefik, and ForwardAuth or a managed BeyondCorp-style service.
Continuous Verification and Monitoring For Zero Trust VPS Architecture
Security doesn’t stop at login; it needs continuous verification and monitoring.
Device posture: Check the health and security status of any device before allowing it to access sensitive systems. Admin user must have disk encryption enabled, Endpoint Detection and Response (EDR) software running, and all security patches installed. This ensures that only secure and compliant devices can connect.
Agents and SIEM: This will help collect and analyze logs from different sources, such as authentication systems, firewalls, Kubernetes audits, and monitoring tools like OSQuery or Wazuh. All these logs are sent to a central SIEM system, which looks for unusual activity or signs of attacks and alerts the security team when something suspicious happens.
Least privilege and JIT: The principle of least privilege and Just-in-Time (JIT) access means users should only have the permissions they need, and only for as long as necessary.
Automate: Automation plays a key role in maintaining security. Using CI/CD pipelines, organizations can automatically update security policies, rotate passwords or encryption keys, and check for configuration changes.
Protecting Data and Secrets For Zero Trust VPS Architecture
Always keep data and secrets secure. You can store sensitive credentials in a vault, use encryption at rest and in transit, and ensure backups are immutable. Sign all code and artifacts to maintain integrity and traceability.
FAQs
Can I apply Zero Trust even if I have only a few VPS servers?
Absolutely. Zero Trust isn’t just for enterprises. Even with a few VPS instances, you can apply principles like disabling password SSH logins, using SSH certificates, and enforcing least privilege access.
Can Zero Trust slow down the system performance?
No. Properly configured, the system performance remains stable. Modern protocols like WireGuard and efficient service meshes provide strong security without significant latency.
What tools are recommended for continuous monitoring in a Zero Trust setup?
Use tools like Wazuh, OSQuery, Prometheus, or Grafana for observability, combined with centralized SIEM systems to analyze authentication logs and policy enforcement data.
Conclusion Zero Trust VPS Hosting Tutorial
You have learned the Zero Trust VPS Hosting Tutorial to build a secure infrastructure. By combining identity-first controls, Microsegmentation, short-lived credentials, and continuous verification, you reduce attacks and increase security in every access request.
At PerLod Hosting, we specialize in secure, high-performance VPS hosting built with modern Zero Trust principles. Whether you manage a single application or hundreds of workloads, our platform is designed for security, scalability, and speed.
We hope you enjoy this guide. Subscribe to X and Facebook to get the latest updates and articles on VPS hosting.
For further reading:
