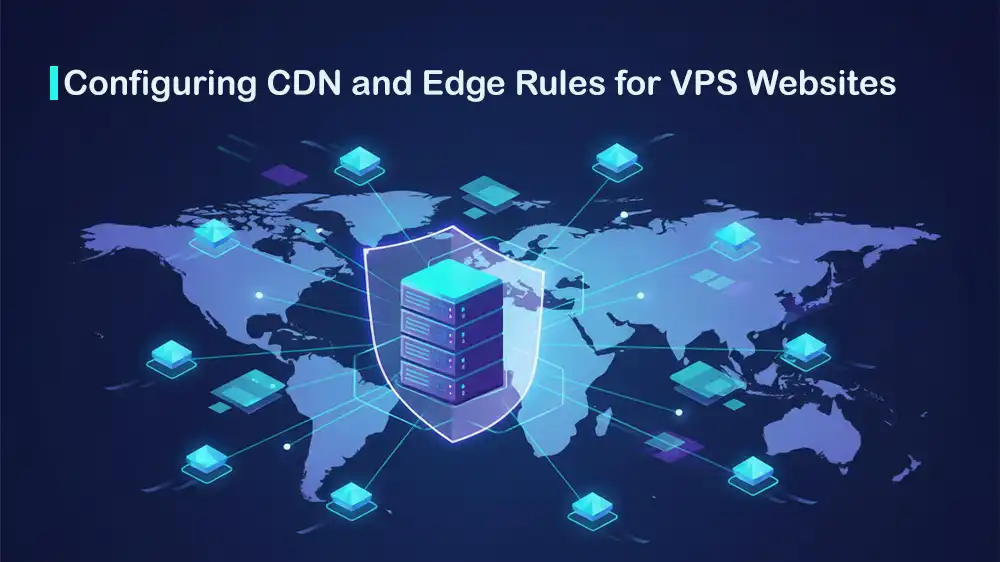
Building a High-Performance VPS with Nginx and Cloudflare Edge Rules
Building a fast website on a VPS is not only about adding more CPU or RAM; it is mainly about delivering your site’s files from the nearest location to the visitor, while your VPS only handles the parts that must run on the server. This guide will show you how to configure a CDN and Edge Rules for VPS websites.
In this tutorial from PerLod Hosting, we want to use Ubuntu 24.04 LTS, Nginx, and Cloudflare’s edge network to enhance your site’s load speed, reduce VPS load, and improve real user performance.
Table of Contents
Prepare VPS Server for CDN and Edge Rules Setup
Before installing the software packages and configuring your server, you must prepare your VPS.
Tip: If you need a reliable VPS server, our VPS plans are designed for fast Nginx performance and work perfectly with Cloudflare CDN and Cache Rules.
You can connect to your VPS IP as the root user and run the system update and upgrade:
ssh root@your_server_ip
apt update && apt upgrade -y
Then create a Sudo user with the commands below:
adduser webadmin
usermod -aG sudo webadmin
To secure SSH access, it is recommended to disable root login and password authentication. On your local computer, run the command below to SSH in without a password:
ssh-copy-id webadmin@your_server_ipFrom your VPS, open the SSH config file with the command below:
nano /etc/ssh/sshd_configLook for the following lines and adjust the values as shown below:
PermitRootLogin no
PasswordAuthentication no
Restart SSH to apply the changes:
systemctl restart sshAlso, allow the required ports through your UFW firewall and enable it:
ufw allow OpenSSH
ufw allow 'Nginx Full'
ufw enable
At this point, you can install the LEMP stack so your server can reliably serve web pages, run dynamic PHP applications, and store website data in a database.
With your sudo user, run the commands below to install and enable Nginx:
sudo apt install nginx -y
sudo systemctl enable nginx
sudo systemctl start nginx
Install MariaDB as your database engine:
sudo apt install mariadb-server -yRun the security script and set a password for it:
sudo mysql_secure_installationUbuntu 24.04 ships with default PHP 8.3, you can use the command below to install PHP and its required packages with the command below:
sudo apt install php8.3-fpm php8.3-mysql php8.3-common php8.3-curl php8.3-gd php8.3-mbstring php8.3-xml php8.3-zip php8.3-bcmath -yDo not forget that you need a Domain’s A record points to VPS IP and is Proxied (orange cloud).
Nginx and Cloudflare Optimization
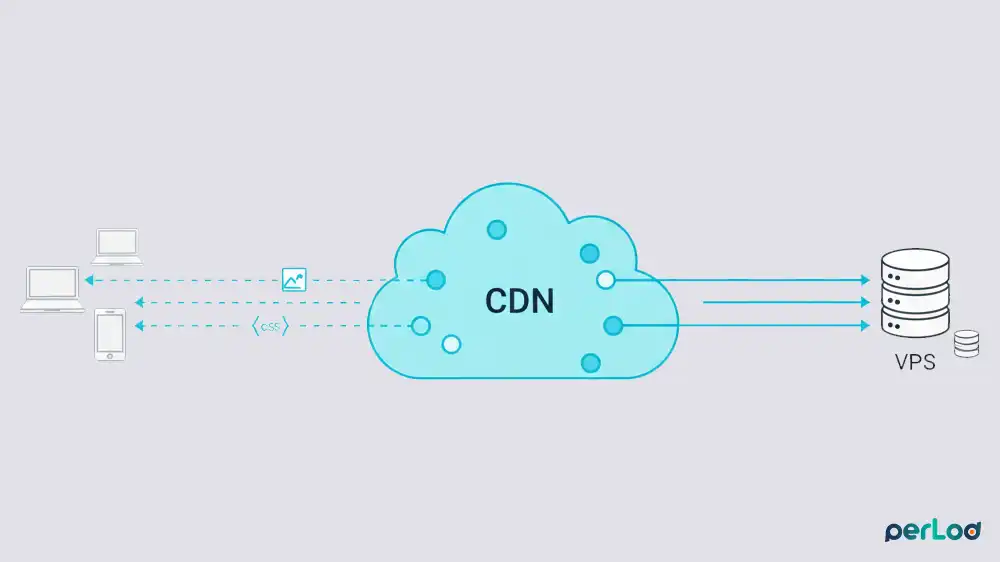
Now you can configure Nginx to work correctly behind Cloudflare. Because Cloudflare acts as a reverse proxy, your VPS will normally see Cloudflare IPs in logs unless you restore the real visitor IP using Cloudflare’s CF-Connecting-IP header and Nginx real IP settings.
Also, you can set strong cache headers for static files so browsers and Cloudflare can safely cache them longer, reducing repeated requests to your VPS and improving load times worldwide.
Nginx must know that Cloudflare is a trusted proxy to log real visitor IPs. Open the following file:
sudo nano /etc/nginx/conf.d/cloudflare-real-ip.confPaste the following block into the file:
# Cloudflare IPv4
set_real_ip_from 173.245.48.0/20;
set_real_ip_from 103.21.244.0/22;
set_real_ip_from 103.22.200.0/22;
set_real_ip_from 103.31.4.0/22;
set_real_ip_from 141.101.64.0/18;
set_real_ip_from 108.162.192.0/18;
set_real_ip_from 190.93.240.0/20;
set_real_ip_from 188.114.96.0/20;
set_real_ip_from 197.234.240.0/22;
set_real_ip_from 198.41.128.0/17;
set_real_ip_from 162.158.0.0/15;
set_real_ip_from 104.16.0.0/13;
set_real_ip_from 104.24.0.0/14;
set_real_ip_from 172.64.0.0/13;
set_real_ip_from 131.0.72.0/22;

# Cloudflare IPv6
set_real_ip_from 2400:cb00::/32;
set_real_ip_from 2606:4700::/32;
set_real_ip_from 2803:f800::/32;
set_real_ip_from 2405:b500::/32;
set_real_ip_from 2405:8100::/32;
set_real_ip_from 2a06:98c0::/29;
set_real_ip_from 2c0f:f248::/32;

real_ip_header CF-Connecting-IP;
Once you are done, save and close the file.
Note: Update this list occasionally from Cloudflare’s official IP list
Now you must create a directory and a unified configuration file that handles PHP and Caching headers simultaneously.
To create the directory and set up the correct ownership and permissions, run the following commands:
sudo mkdir -p /var/www/yourdomain.com
sudo chown -R www-data:www-data /var/www/yourdomain.com
sudo chmod -R 755 /var/www/yourdomain.com
Create the configuration file with your domain name:
sudo nano /etc/nginx/sites-available/yourdomain.comAdd the following optimized configuration to the file:
server {
    listen 80;
    server_name yourdomain.com www.yourdomain.com;
    root /var/www/yourdomain.com;
    index index.php index.html;

    # Logging (Real IPs will show here)
    access_log /var/log/nginx/yourdomain.access.log;
    error_log /var/log/nginx/yourdomain.error.log;

    location / {
        try_files $uri $uri/ /index.php?$args;
    }

    # PHP Handling (Connects to PHP 8.3 FPM)
    location ~ \.php$ {
        include snippets/fastcgi-php.conf;
        fastcgi_pass unix:/run/php/php8.3-fpm.sock;
        fastcgi_param SCRIPT_FILENAME $document_root$fastcgi_script_name;
        include fastcgi_params;
    }

    # CDN Optimization: Static Assets
    # Sets strong headers so Cloudflare knows it is allowed to cache these
    location ~* \.(jpg|jpeg|png|gif|ico|css|js|svg|webp|woff|woff2|ttf)$ {
        expires 30d;
        add_header Cache-Control "public, no-transform";
        access_log off;
    }

    # Security: Deny hidden files
    location ~ /\.ht {
        deny all;
    }
}
If the Nginx default config file stays enabled, it can hijack traffic when the configs mismatch. You can remove it with:
sudo rm -f /etc/nginx/sites-enabled/defaultWhen you are finished, enable the configuration, check for syntax errors, and reload Nginx to apply the changes:
sudo ln -s /etc/nginx/sites-available/yourdomain.com /etc/nginx/sites-enabled/
sudo nginx -t
sudo systemctl reload nginx
Then, you can connect to your database engine and create the database for your app, for example, WordPress:
sudo mariadb -u root -pFrom your MariaDB shell, you can run:
CREATE DATABASE app_db;
CREATE USER 'app_user'@'localhost' IDENTIFIED BY 'StrongPassword123!';
GRANT ALL PRIVILEGES ON app_db.* TO 'app_user'@'localhost';
FLUSH PRIVILEGES;
EXIT;
Secure HTTPS Between Cloudflare and VPS
In this step, you can configure SSL the right way so traffic is encrypted not only between the visitor and Cloudflare, but also between Cloudflare and your VPS. This prevents SSL errors, redirect loops, and insecure setups, while ensuring Cloudflare can safely proxy and accelerate your site over HTTPS.
To do this, you can use a valid SSL certificate on the VPS via Let’s Encrypt and set Cloudflare’s SSL mode to use that certificate so both sides of the connection stay protected.
Install Certbot with the command below:
sudo apt install certbot python3-certbot-nginx -yGet your SSL certificates for your domain name with the command below:
sudo certbot --nginx -d yourdomain.com -d www.yourdomain.comNote: Ensure your DNS points to the server IP before running the above command.
Now that the VPS has SSL, you can configure Cloudflare to use it.
From the Cloudflare dashboard settings, navigate to SSL/TLS, Overview, and set it to Full (Strict).
Note: Never use “Flexible” when the VPS has an SSL certificate; it causes redirect loops.
Also, from the DNS section, ensure the Proxy status (Orange Cloud) is enabled.
Advanced Cloudflare Edge Rules: Force Cache at the Edge
At this point, you can use Cloudflare Cache Rules to control exactly what gets cached on Cloudflare’s edge servers and what must always come from your VPS.
Cloudflare Cache Rules let you mark requests as Eligible for cache or Bypass cache, then set an Edge TTL and a Browser TTL.
The goal is to cache static files aggressively, so Cloudflare serves them fast from the edge instead of requesting them from your VPS. At the same time, you should bypass caching for admin pages and other sensitive or dynamic parts of the site.
Cloudflare also lets you force caching by setting the Edge TTL to “Ignore cache-control header and use this TTL,” which means Cloudflare will cache those matching files even if your VPS sends different cache headers.
From the Cloudflare dashboard, navigate to:
Caching > Cache Rules > Create RuleRule 1: Bypass Admin, which protects your backend from being cached.
- Name: Do Not Cache Admin
- Expression: URI Path contains /wp-admin OR URI Path contains /wp-login.php
- Action: Bypass cache.
Rule 2: Aggressive Static Cache, which forces images or CSS to stay on Cloudflare’s servers for 1 month.
- Name: Force Static Cache
- Expression: File Extension is in jpg, jpeg, png, webp, css, js, svg, woff2
- Action: Eligible for cache.
- Edge TTL: Ignore cache-control header = 1 Month.
- Browser TTL: Override origin = 1 Year.
Verify CDN and Edge Rules for VPS Websites
Now that the VPS, Nginx, SSL, and Cloudflare rules are in place, the next step is to verify each layer is working as expected.
You can test PHP by creating a test file:
echo "<?php phpinfo(); ?>" | sudo tee /var/www/yourdomain.com/info.phpThen, visit the following URL. If it loads, PHP is working.
https://yourdomain.com/info.phpTo test the CDN cache, you can run the command below from your local machine:
curl -I https://yourdomain.com/wp-content/uploads/some-image.jpgLook for the following headers:
- cf-cache-status: HIT
- cache-control: public, max-age=31536000
To test the real IP, you can check the logs on the VPS:
tail -f /var/log/nginx/yourdomain.access.logVisit the site, and you should see your actual ISP IP address, not a Cloudflare IP.
FAQs
Why does my browser show ERR_TOO_MANY_REDIRECTS after enabling Cloudflare?
This happens when Cloudflare is set to “Flexible” SSL, but your Nginx server is configured to force HTTPS. You must set it to Full (Strict).
How do I know if Cloudflare is actually caching my site?
Run curl -I https://yourdomain.com/image.jpg in your terminal. If you see cf-cache-status: HIT, it’s working. If you see DYNAMIC, check your Cache Rules configuration to ensure the file extension is listed in the “Force Static Cache” rule.
What happens if my VPS goes down while using Cloudflare?
Cloudflare will continue serving cached static assets to visitors, but dynamic pages will fail with a 502 error.
Conclusion
Now you have successfully built a CDN and Edge Rules for VPS Websites infrastructure. Your VPS is no longer handling repetitive requests for static files; Cloudflare’s edge network does that from 300+ cities worldwide. This means faster load times and reduced server CPU usage.
We hope you enjoy this CDN and Edge Rules for VPS Websites guide. Subscribe to our X and Facebook channels to get the latest articles.
For further reading:
