
How to Install PocketBase on Ubuntu with systemd, Caddy, and Automatic HTTPS
PocketBase is a lightweight, open-source backend that runs from a single file and gives you a database, authentication, file storage, real-time features, and an admin dashboard. It helps you build app backends fast without setting up many separate services, and you can self-host it on your own server. This guide shows you how to install PocketBase on Ubuntu for a real VPS setup with systemd, Caddy, and automatic HTTPS.
PocketBase is completely portable, so you can install it as a single executable and grow from a small test app to a production server.
Table of Contents
What You Need to Install PocketBase on Ubuntu
Before you install PocketBase on Ubuntu, make sure your domain already points to the VPS because Caddy can get and renew HTTPS certificates only when the hostname resolves to your server and ports 80 and 443 are open.
To set up PocketBase safely, use a non-root app user, keep the service on localhost, and let Caddy face the public internet. For a small public deployment, a lightweight Linux VPS is a good option for this kind of stack.
If you still need a name for the server, get a custom domain before you turn on HTTPS.
For this setup guide, use a recent Ubuntu LTS server and replace:
yourdomain.com with your real domain
ad***@*****le.com with your admin email
StrongPassword123! with a strong password
Step 1. Install Required Packages and Set up Firewall
First, update the server and install the required packages:
sudo apt update && sudo apt upgrade -y
sudo apt install curl unzip ufw caddy -y
We assume you have UFW firewall installed on your server. Allow the required ports through the firewall:
sudo ufw allow OpenSSH
sudo ufw allow 80/tcp
sudo ufw allow 443/tcp
sudo ufw enable
Step 2. Create Main Folders for PocketBase
The best way to install PocketBase on Ubuntu is to keep the binary in /opt, keep data in /var/lib, and run the app with systemd.
Use the commands below to create a dedicated service user, main folders, and set the correct permissions:
sudo adduser --system --group --home /var/lib/pocketbase pocketbase

sudo mkdir -p /opt/pocketbase/releases
sudo mkdir -p /var/lib/pocketbase/pb_data
sudo mkdir -p /var/backups/pocketbase

sudo chown -R pocketbase:pocketbase /var/lib/pocketbase
sudo chown -R pocketbase:pocketbase /var/backups/pocketbase

sudo chmod 755 /opt/pocketbase
sudo chmod 755 /opt/pocketbase/releases
sudo chmod 750 /var/lib/pocketbase
sudo chmod 750 /var/lib/pocketbase/pb_data
sudo chmod 750 /var/backups/pocketbase
Step 3. Install PocketBase on Ubuntu
At this point, you can install PocketBase on Ubuntu by downloading the binary, putting it in a release folder, and linking current to the active version.
In this guide, we use PocketBase 0.39.4. If your VPS uses ARM64, replace linux_amd64 with linux_arm64 when you download the release file.
PB_VERSION="0.39.4"
ARCH="linux_amd64"

cd /tmp
curl -fsSLO "https://github.com/pocketbase/pocketbase/releases/download/v${PB_VERSION}/pocketbase_${PB_VERSION}_${ARCH}.zip"

rm -rf /tmp/pocketbase-extract
mkdir -p /tmp/pocketbase-extract
unzip "pocketbase_${PB_VERSION}_${ARCH}.zip" -d /tmp/pocketbase-extract

sudo mkdir -p "/opt/pocketbase/releases/${PB_VERSION}"
sudo install -m 755 /tmp/pocketbase-extract/pocketbase "/opt/pocketbase/releases/${PB_VERSION}/pocketbase"

sudo ln -sfn "/opt/pocketbase/releases/${PB_VERSION}" /opt/pocketbase/current
If your app uses hooks or migrations, copy them next to the binary like this:
sudo mkdir -p /opt/pocketbase/current/pb_hooks
sudo mkdir -p /opt/pocketbase/current/pb_migrations
sudo chown -R pocketbase:pocketbase /opt/pocketbase/current
Step 4. Create PocketBase Systemd Unit File
At this point, you must create the system unit file with the command below:
sudo tee /etc/systemd/system/pocketbase.service > /dev/null <<'EOF'
[Unit]
Description=PocketBase
After=network-online.target
Wants=network-online.target

[Service]
Type=simple
User=pocketbase
Group=pocketbase
WorkingDirectory=/opt/pocketbase/current
ExecStart=/opt/pocketbase/current/pocketbase serve --http=127.0.0.1:8090 --dir /var/lib/pocketbase/pb_data
Restart=always
RestartSec=5
LimitNOFILE=4096
PrivateTmp=true
NoNewPrivileges=true

[Install]
WantedBy=multi-user.target
EOF
Reload systemd, start the service, and check it by running the following commands:
sudo systemctl daemon-reload
sudo systemctl enable --now pocketbase
sudo systemctl status pocketbase --no-pager
Step 5. Create First PocketBase Admin Account
From the CLI, you can run the command below to create the first admin account:
sudo -u pocketbase /opt/pocketbase/current/pocketbase superuser create ad***@*****le.com StrongPassword123! --dir /var/lib/pocketbase/pb_dataAt this point, your work to install PocketBase on Ubuntu is nearly done, and the app should listen only on 127.0.0.1:8090 behind the proxy.
You can test the local backend from the server:
curl http://127.0.0.1:8090/api/healthIn the output, you must see:
{"message":"API is healthy.","code":200,"data":{}}Step 6. Add HTTPS with Caddy for PocketBase
To install PocketBase on Ubuntu for public use, you can put Caddy in front of it instead of exposing port 8090. Do not try PocketBase with automatic HTTPS before DNS is correct, because Caddy needs a valid hostname and access to ports 80 and 443 to issue a public certificate.
Also, Caddy handles HTTP to HTTPS redirect and certificate renewal by default when the hostname is set and reachable.
Create the Caddy config file with the command below:
sudo tee /etc/caddy/Caddyfile > /dev/null <<'EOF'
yourdomain.com {
    request_body {
        max_size 10MB
    }

    reverse_proxy 127.0.0.1:8090 {
        transport http {
            read_timeout 360s
        }
    }
}
EOF
Validate the config and reload Caddy:
sudo caddy validate --config /etc/caddy/Caddyfile
sudo systemctl reload caddy
sudo systemctl status caddy --no-pager
If you got a warning from the validation that Caddyfile input is not formatted, you can fix it by:
sudo caddy fmt --overwrite /etc/caddy/CaddyfileStep 7. Access PockeBase Admin Dashboard
The PocketBase admin dashboard is served at /_/. You can access from your browser by:
https://yourdomain.com/_/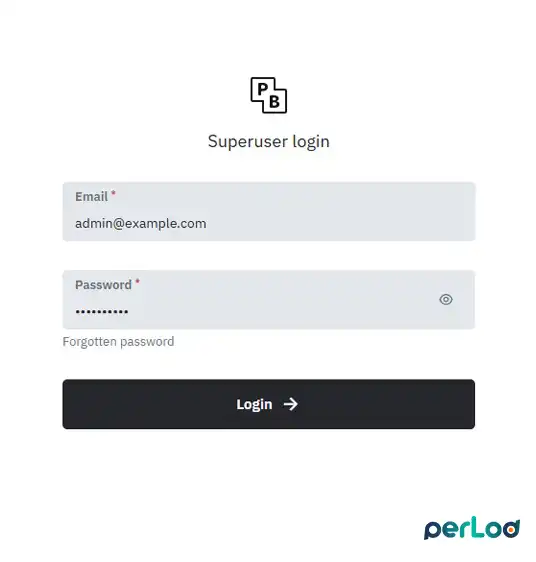
From the PocketBase dashboard, you can manage your backend in one place, including database collections, users, uploaded files, logs, and settings. You can also create and edit records, manage authentication-related data, check API activity, and handle admin access from the dashboard UI.

After you install PocketBase on Ubuntu behind a reverse proxy, set the User IP proxy headers in PocketBase settings so it can record the real client IP, usually X-Real-IP and X-Forwarded-For.
A few useful checks include:
journalctl -u pocketbase -n 50 --no-pager
journalctl -u caddy -n 50 --no-pager
curl -I https://yourdomain.com
How to Update and Back Up PocketBase
A safe way for production is to update PocketBase with a new release folder, test it, then move the current symlink. This keeps the layout simple and gives you a quick rollback path if the new version does not act the way you expect.
Example update flow:
NEW_VERSION="0.39.5"
ARCH="linux_amd64"

cd /tmp
curl -fsSLO "https://github.com/pocketbase/pocketbase/releases/download/v${NEW_VERSION}/pocketbase_${NEW_VERSION}_${ARCH}.zip"

rm -rf /tmp/pocketbase-extract
mkdir -p /tmp/pocketbase-extract
unzip "pocketbase_${NEW_VERSION}_${ARCH}.zip" -d /tmp/pocketbase-extract

sudo mkdir -p "/opt/pocketbase/releases/${NEW_VERSION}"
sudo install -m 755 /tmp/pocketbase-extract/pocketbase "/opt/pocketbase/releases/${NEW_VERSION}/pocketbase"

sudo cp -a /opt/pocketbase/current/pb_hooks "/opt/pocketbase/releases/${NEW_VERSION}/" 2>/dev/null || true
sudo cp -a /opt/pocketbase/current/pb_migrations "/opt/pocketbase/releases/${NEW_VERSION}/" 2>/dev/null || true

sudo ln -sfn "/opt/pocketbase/releases/${NEW_VERSION}" /opt/pocketbase/current
sudo systemctl restart pocketbase
sudo systemctl status pocketbase --no-pager
For real projects, it is recommended to back up pb_data and stop the app first if you use file-copy backups, because PocketBase says copying that directory is enough when the app is not running.
Another reason people install PocketBase on Ubuntu is the simple built-in backup flow in the dashboard, which saves a full ZIP snapshot of pb_data under Settings > Backups.
For a simple file backup, you can use:
sudo systemctl stop pocketbase
sudo rsync -a /var/lib/pocketbase/pb_data/ /var/backups/pocketbase/$(date +%F)/
sudo systemctl start pocketbase
For a simple restore, you can use:
sudo systemctl stop pocketbase
sudo rsync -a /var/backups/pocketbase/2026-06-24/ /var/lib/pocketbase/pb_data/
sudo chown -R pocketbase:pocketbase /var/lib/pocketbase/pb_data
sudo systemctl start pocketbase
Conclusion
Now you have a clean way to install PocketBase on Ubuntu with a dedicated user, systemd, Caddy, and automatic HTTPS. You can point your custom domain and run PocketBase on a PerLod Linux VPS for a lightweight backend stack.
We hope you enjoy this guide. For more detailed production information, you can visit the PocketBase production docs.
FAQs
Do I need Docker for setting up PocketBase?
No. PocketBase can run as a single binary on the server.
Where is the PocketBase admin page?
It is at /_/ on your domain.
Should PocketBase listen on the public IP?
No, keep it on 127.0.0.1:8090 and let Caddy handle public traffic.
