MikroTik Dual WAN Failover Setup for Home and Small Office Internet
Whether you work from home, run a small office, or just hate losing internet in the middle of an important call, a MikroTik dual WAN failover setup gives you a real backup that activates automatically. In this guide, you will learn everything from understanding how failover works in RouterOS to setting it up with two WAN links, fiber plus LTE, or two wired ISPs.
Table of Contents
What Is a MikroTik Dual WAN Failover Setup?
A MikroTik dual WAN failover setup means connecting two internet lines to your MikroTik router and telling it; Use Line 1 first:
If it stops working, automatically switch to Line 2. When Line 1 comes back, switch back.
This is different from load balancing, where both lines share traffic at the same time. With failover, one line is your primary, and the other stays on standby. The moment your primary ISP goes down, even for a few seconds, your router shifts traffic to the backup line, and your internet keeps working.
This setup is useful for:
- Home offices that need uninterrupted video calls or VPN connections.
- Small businesses that rely on the internet for payments, CCTV, or cloud tools.
- Anyone using fiber as primary with LTE/4G as a cheap backup.
- Offices with two wired ISP connections for redundancy.
How Dual WAN Failover Works in RouterOS
RouterOS uses route distance to decide which path to use; the route with the lowest distance number wins. By default, a static route has distance 1. You give your primary WAN distance 1 and your backup WAN distance 2 or higher.
Also, RouterOS has a feature called check-gateway, which, when you add check-gateway=ping to a route, the router sends a ping to that gateway every 10 seconds. If two pings in a row fail with no response, RouterOS marks that gateway as unreachable and disables that route. Then, the next route, which is your backup, takes over automatically.
When the primary gateway starts responding to pings again, RouterOS brings that route back, and your traffic returns to the main ISP. This is called failback.
What You Need Before Setting up Dual WAN Failover
Before MikroTik dual WAN failover setup, make sure you have:
- A MikroTik router with at least 3 Ethernet ports, for example, hEX, RB750Gr3, RB4011, and CCR series.
- Two active internet connections, such as a fiber plus LTE router, or two wired ISPs.
- Access to WinBox or SSH Terminal to configure the router.
- Basic knowledge of the RouterOS IP menu.
In this guide, we use this port layout:
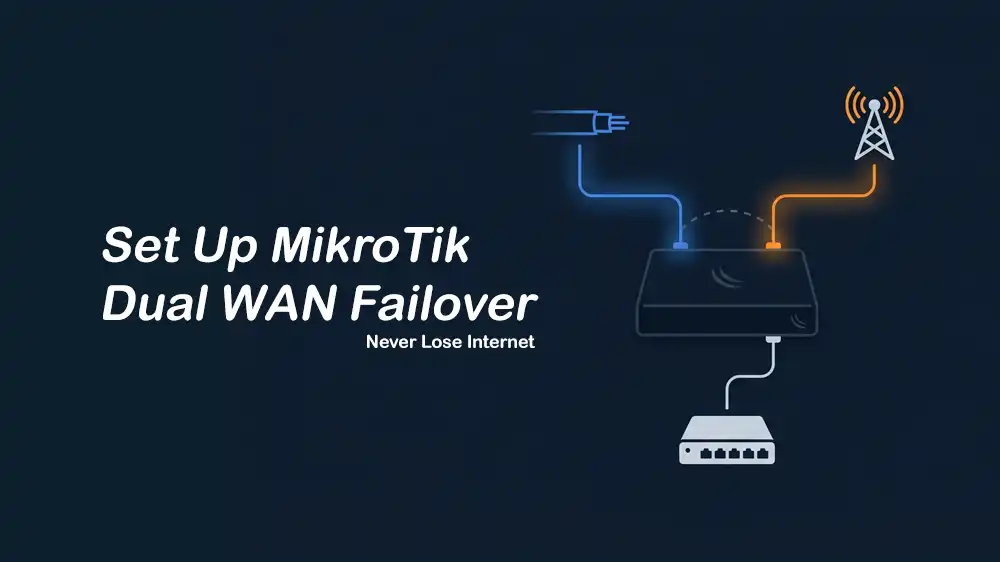
ether1: WAN1, Primary ISP, for example, Fiber.ether2: WAN2, Backup ISP, for example, LTE/4G router or second wired ISP.ether3orbridge: LAN, your local network.
Step 1. Configure the WAN Interfaces
First, you must be sure that both WAN ports have their IP addresses set and can reach the internet.
Option A: Both ISPs Use DHCP (Most Common for Fiber plus LTE)
This is the simplest case. Your ISP provides an IP automatically via DHCP.
For Primary WAN1, you can use:
/ip dhcp-client
add interface=ether1 disabled=no add-default-route=yes default-route-distance=1 comment="WAN1 Primary"
For Backup WAN2, you can use:
/ip dhcp-client
add interface=ether2 disabled=no add-default-route=yes default-route-distance=2 comment="WAN2 Backup"
Setting default-route-distance=2 on WAN2 means the DHCP-assigned default route for WAN2 will have a higher distance than WAN1, so WAN1 always takes priority.
Option B: Static IP on One or Both ISPs
If your ISP gives you a fixed IP address, you must skip the DHCP client and set the address manually.
For example, WAN2 with static IP:
/ip address
add address=172.28.62.195/24 interface=ether2 comment="WAN2 Static"

/ip route
add dst-address=0.0.0.0/0 gateway=172.28.62.1 distance=2 comment="WAN2 Default Route"
Option C: PPPoE Connection (Some Fiber ISPs)
Some ISPs use PPPoE to authenticate. For this purpose, you can use:
/interface pppoe-client
add interface=ether1 name=pppoe-wan1 user=your_username password=your_password disabled=no add-default-route=no comment="WAN1 PPPoE"Note: Set add-default-route=no here, then add the route manually in the next step so you can control the distance.
Step 2. Set Up NAT for Both WANs
Your router needs to translate or masquerade traffic going out through each WAN interface. Without this, devices on your LAN will not be able to reach the internet through either connection. To do this, you can use:
/ip firewall nat
add chain=srcnat action=masquerade out-interface=ether1 comment="NAT WAN1"
add chain=srcnat action=masquerade out-interface=ether2 comment="NAT WAN2"
This creates two simple NAT rules, one per WAN. RouterOS applies the correct rule based on the active interface.
Step 3. Add Default Routes with Check-Gateway
This is the core of the MikroTik dual WAN failover setup. You need two default routes, each pointing to a different ISP gateway, with different distances and check-gateway=ping enabled.
The simple method works well when your ISP gateway IP is static:
/ip route
add dst-address=0.0.0.0/0 gateway=ISP1_GATEWAY_IP distance=1 check-gateway=ping comment="Primary WAN1"
add dst-address=0.0.0.0/0 gateway=ISP2_GATEWAY_IP distance=2 check-gateway=ping comment="Backup WAN2"
Replace ISP1_GATEWAY_IP and ISP2_GATEWAY_IP with the actual gateway IPs your ISPs give you. You can find these under IP > DHCP Client in the Status tab after the DHCP lease is active.
With check-gateway=ping, the router pings each gateway every 10 seconds. After two consecutive failed pings, about 20 seconds total, the route is marked unreachable, and the backup takes over.
Step 4. Recursive Routes for Deeper Internet Monitoring (Recommended)
The above method only checks if your ISP gateway is alive, not if the internet itself is reachable beyond the gateway. A better method uses recursive routing to monitor a reliable Internet host, such as Google DNS.
You must pin the monitoring hosts to each WAN:
/ip route
add dst-address=8.8.8.8/32 gateway=ISP1_GATEWAY_IP scope=10 comment="Monitor host via WAN1"
add dst-address=8.8.4.4/32 gateway=ISP2_GATEWAY_IP scope=10 comment="Monitor host via WAN2"
The 8.8.8.8 and 8.8.4.4 are Google’s public DNS servers, reliable and always on. The scope=10 setting forces this specific host to be reached only through that gateway, not via any other route.
Then, you must add recursive default routes that follow those monitoring hosts:
/ip route
add dst-address=0.0.0.0/0 gateway=8.8.8.8 distance=1 check-gateway=ping target-scope=11 comment="Primary Default via WAN1"
add dst-address=0.0.0.0/0 gateway=8.8.4.4 distance=2 check-gateway=ping target-scope=11 comment="Backup Default via WAN2"
Here, the default route does not point to the ISP gateway directly; it points to 8.8.8.8 and resolves how to reach it using the route we added above. If 8.8.8.8 becomes unreachable via WAN1, that default route goes inactive, and the WAN2 route takes over.
The target-scope=11 value tells RouterOS it is allowed to use the recursive resolution.
This is a better method because your ISP modem may still respond to pings even when the actual internet is down, a very common scenario with fiber or LTE connections. Recursive routing catches real internet outages, not just gateway failures.
Step 5. Configure DNS for Dual WAN Failover
You must set reliable public DNS servers so name resolution keeps working even if your ISP’s DNS is down during a failover:
/ip dns
set servers=8.8.8.8,8.8.4.4 allow-remote-requests=yes
The allow-remote-requests=yes lets devices on your LAN use the MikroTik router as their DNS server.
Full Configuration for Fiber plus LTE Example
This is a very common real-world setup for fiber as the main line and an LTE/4G router plugged into ether2 as a backup.
In this scenario:
- ether1 connected to fiber modem (DHCP)
- ether2 connected to LTE 4G router (DHCP, LAN IP, for example
192.168.2.1) - LAN on bridge1 with
192.168.88.0/24
Full CLI config:
# DHCP clients
/ip dhcp-client
add interface=ether1 disabled=no add-default-route=no comment="Fiber WAN1"
add interface=ether2 disabled=no add-default-route=yes default-route-distance=2 comment="LTE WAN2"

# NAT rules
/ip firewall nat
add chain=srcnat action=masquerade out-interface=ether1 comment="NAT Fiber"
add chain=srcnat action=masquerade out-interface=ether2 comment="NAT LTE"

# Monitoring hosts pinned to each WAN
# (Replace with actual gateway IPs from DHCP client status)
/ip route
add dst-address=8.8.8.8/32 gateway=FIBER_GW scope=10 comment="Monitor via Fiber"
add dst-address=8.8.4.4/32 gateway=LTE_GW scope=10 comment="Monitor via LTE"

# Recursive default routes
add dst-address=0.0.0.0/0 gateway=8.8.8.8 distance=1 check-gateway=ping target-scope=11 comment="Primary via Fiber"
add dst-address=0.0.0.0/0 gateway=8.8.4.4 distance=2 check-gateway=ping target-scope=11 comment="Backup via LTE"

# DNS
/ip dns
set servers=8.8.8.8,8.8.4.4 allow-remote-requests=yesNote: Replace FIBER_GW and LTE_GW with the gateway IPs shown in IP > DHCP Client > Status after your clients connect.
Full Configuration for Two Wired ISPs Example
If you have two wired internet connections, for example, from two different ISPs, the setup is almost identical to the fiber example, but both connections tend to use static or DHCP-assigned IPs from proper ISP equipment.
Here is an example setup using:
- ISP1:
203.0.113.2/30 - Gateway:
203.0.113.1 - ISP2: DHCP
# Static IP on ether1 (WAN1)
/ip address
add address=203.0.113.2/30 interface=ether1 comment="WAN1 Static"

# DHCP on ether2 (WAN2)
/ip dhcp-client
add interface=ether2 disabled=no add-default-route=yes default-route-distance=2 comment="WAN2 DHCP"

# NAT
/ip firewall nat
add chain=srcnat action=masquerade out-interface=ether1 comment="NAT WAN1"
add chain=srcnat action=masquerade out-interface=ether2 comment="NAT WAN2"

# Routes with check-gateway
/ip route
add dst-address=0.0.0.0/0 gateway=203.0.113.1 distance=1 check-gateway=ping comment="Primary WAN1"
add dst-address=0.0.0.0/0 gateway=ISP2_GATEWAY distance=2 check-gateway=ping comment="Backup WAN2"
How Failover and Failback Work
When everything is running fine, all traffic goes through WAN1, distance=1. The router is quietly sending a ping to the gateway or internet host every 10 seconds in the background.
When WAN1 fails:
- RouterOS sends a ping to the WAN1 gateway, no response (timeout).
- It sends a second ping, still no response.
- After two consecutive failures, it marks the WAN1 route as unreachable.
- The WAN2 route, distance=2, activates automatically.
- Traffic shifts to WAN2, your internet stays on.
When WAN1 comes back (Failback):
- RouterOS keeps sending pings in the background even during failover.
- The moment the WAN1 gateway starts responding again, the WAN1 route becomes active.
- Since it has a lower distance, it takes priority automatically.
- Traffic returns to WAN1, no manual action needed.
The entire failover process takes about 20 to 30 seconds from failure detection to switching.
How to Check Current Routing State
You can always see the current state of your routes in WinBox or Terminal.
In WinBox, you can go to IP > Routes. Active routes show a checkmark (A), and Inactive routes show no checkmark.
In the terminal, you can run:
/ip route printLook for the route with A (active) in the flags column. During failover, WAN1’s default route will show inactive (I), and WAN2’s route will become active.
To watch it update in real time, you can use:
/ip route print interval=2Testing MikroTik Dual WAN Failover Setup
After configuration, you can test it to make sure it actually works. First, you must disable the WAN1 port:
/interface disable ether1Then open a browser or ping 8.8.8.8. Within 20 to 30 seconds, the internet should work via WAN2.
Next, check the route table:
/ip route printYou should see WAN1’s default route become inactive and WAN2’s route become active.
Now you must re-enable and check failback:
/interface enable ether1Wait 20 to 30 seconds and confirm traffic returns to WAN1.
Finally, you can check the logs:
/log print where topics~"route"RouterOS logs gateway state changes, which helps confirm that the failover and failback events happened.
Using Netwatch RouterOS Tool: An Alternative Monitoring Method
Another way to test failover is using Netwatch, a RouterOS tool that monitors a remote host and runs a script when it goes up or down.
The difference from check-gateway:
- The check-gateway only monitors the next-hop gateway, the ISP router next to you.
- Netwatch can monitor any public internet host, giving you true end-to-end internet verification.
Simple Netwatch failover example:
/tool netwatch
add host=8.8.8.8 interval=10s timeout=5s \
  down-script="/ip route disable [find comment=\"Primary WAN1\"]" \
  up-script="/ip route enable [find comment=\"Primary WAN1\"]"
This watches 8.8.8.8 every 10 seconds. If it fails, it disables the primary route. When it comes back, it re-enables it.
Netwatch is more work to set up but gives you more control, especially useful if your ISP gateway stays alive even during internet outages, a common issue with some fiber/LTE setups.
Tip: You can review MikroTik firewall best practices to secure your setup after the MikroTik dual WAN failover setup is completed.
Common Issues and Fixes
Even a correct setup can run into small problems, usually a missing rule, a wrong scope value, or a DNS issue. Here are the most common things people get wrong and how to fix them quickly.
| Problem | Cause | Fix |
|---|---|---|
| Failover does not happen | check-gateway not set on primary route | Add check-gateway=ping to the primary route |
| Both routes become inactive | Wrong scope on recursive routes | Set scope=10 on host routes, target-scope=11 on defaults |
| Internet works but DNS fails | DNS pointing to a down server | Set public DNS: 8.8.8.8, 8.8.4.4 |
| Traffic does not return to WAN1 | Failback not automatic | Confirm WAN1 route has lower distance and check-gateway=ping is active |
| NAT broken on WAN2 | Missing masquerade rule for ether2 | Add srcnat masquerade out-interface=ether2 |
| DHCP gateway changes break routes | Using IP instead of interface | For DHCP ISPs, let DHCP handle the default route with default-route-distance setting |
Quick Reference: Route Distance on RouterOS
RouterOS picks the best route based on the distance number; the lower the number, the higher the priority. This table gives you a quick look at how to assign distances for a MikroTik dual WAN failover setup.
| Route | Distance | Purpose |
|---|---|---|
| WAN1 default route | 1 | Primary, always used first |
| WAN2 default route | 2 or higher | Backup, takes over when WAN1 fails |
Host monitoring route (8.8.8.8) | scope=10 | Forces monitor traffic through specific gateway |
Recursive default via 8.8.8.8 | 1 and target-scope=11 | Primary failover using internet check |
Recursive default via 8.8.4.4 | 2 and target-scope=11 | Backup failover using internet check |
Conclusion
A MikroTik dual WAN failover setup is one of the most practical things you can do for your home or small office network. With two internet connections and a few route settings, you get automatic failover that takes in within 20 to 30 seconds, keeps existing connections alive where possible, and brings traffic back to your main ISP as soon as it recovers.
The simple check-gateway=ping method works well for most setups. If you want more reliability, the recursive routing method adds internet-level monitoring on top of basic gateway checks. Either way, RouterOS handles the switching automatically; you do not need scripts, cron jobs, or manual intervention.
For a more advanced and secure RouterOS environment, you can run MikroTik inside a VPS. Check the secure MikroTik VPS servers to run advanced routing and failover from a stable cloud-based RouterOS environment.
We hope you enjoy this guide. Subscribe to our X channel to get the latest MikroTik updates.
FAQs
How long does a failover take on MikroTik?
RouterOS checks the gateway every 10 seconds and needs two consecutive failures before switching. This means failover typically happens within 20 to 30 seconds of an outage.
What is the difference between failover and load balancing?
Failover uses one link at a time, primary active, backup on standby. Load balancing uses both links simultaneously to share traffic.
Do I need a special MikroTik model for dual WAN?
No. Any MikroTik router with at least two free Ethernet ports works, including the affordable hEX (RB750Gr3), RB4011, or any CCR series.
