How to Install Nginx Proxy Manager with Docker Compose and Let’s Encrypt on Ubuntu
If you are running multiple apps on a single VPS and need a way to route traffic to each one with HTTPS, Nginx proxy manager Docker Compose is one of the easiest setups you can do. Instead of writing Nginx config files or dealing with Certbot manually, Nginx Proxy Manager (NPM) gives you a simple web dashboard where you can add proxy hosts, request free SSL certificates from Let’s Encrypt, and manage everything in a browser.
Table of Contents
What Is Nginx Proxy Manager?
Nginx Proxy Manager is a free tool that wraps Nginx inside a friendly web GUI. It handles reverse proxy configuration, free SSL certificate generation via Let’s Encrypt, redirects, access lists, and more, all without touching a single config file.
It is a great choice if you want:
- A GUI-based reverse proxy you can manage without SSH every time.
- Automatic Let’s Encrypt SSL certificates with zero manual renewal.
- A beginner-friendly alternative to Traefik or Caddy for single-server setups.
- Support for WebSocket-based apps like Nextcloud, Vaultwarden, and Home Assistant.
Compared to Traefik or Caddy, NPM is the easiest option. Traefik has better Docker auto-discovery via labels. Caddy has simpler config files. For most self-hosted single-server setups, NPM is the best starting point. If you prefer a label-driven approach, you can check out our guide on setting up Traefik with Docker Compose.
Prerequisites for Nginx Proxy Manager Docker Compose Setup
Before you start, make sure you have the following ready:
- A fresh Ubuntu 22.04 or 24.04 VPS.
- Root or sudo access.
- Docker and Docker Compose are installed.
- A domain name with DNS access.
- Ports 80, 81, and 443 are not in use by another service.
- Your server’s public IP address is ready.
Step 1. Install Docker on Ubuntu
First, update your system and install the required packages:
sudo apt update && sudo apt upgrade -y
sudo apt install apt-transport-https ca-certificates curl software-properties-common -y
Add Docker’s official GPG key and repository:
curl -fsSL https://download.docker.com/linux/ubuntu/gpg | sudo gpg --dearmor -o /etc/apt/keyrings/docker.gpg
sudo chmod a+r /etc/apt/keyrings/docker.gpg

echo \
  "deb [arch=$(dpkg --print-architecture) signed-by=/etc/apt/keyrings/docker.gpg] https://download.docker.com/linux/ubuntu \
  $(lsb_release -cs) stable" | sudo tee /etc/apt/sources.list.d/docker.list > /dev/null
Now install Docker Engine and the Compose plugin:
sudo apt update
sudo apt install docker-ce docker-ce-cli containerd.io docker-buildx-plugin docker-compose-plugin -y
Verify Docker is running:
sudo systemctl status docker
sudo docker run hello-world
To run Docker without sudo, add the user to the Docker group:
sudo usermod -aG docker $USER
newgrp docker
Step 2. Configure DNS Records
Before you deploy anything, your domain needs to point to your server. Log in to your DNS provider and create an A record for each subdomain you plan to use:
| Type | Name | Value |
|---|---|---|
| A | app | Your server’s public IP |
| A | git | Your server’s public IP |
| A | @ | Your server’s public IP |
DNS changes can take a few minutes to a few hours to propagate. You can check with:
dig +short app.yourdomain.comIt should return your server’s IP. Let’s Encrypt will fail to issue a certificate if DNS is not pointing to your server at the time of the request.
Step 3. Open Firewall Ports
If UFW is active on your server, you need to allow the three ports that Nginx proxy manager Docker Compose uses:
sudo ufw allow 80    # HTTP
sudo ufw allow 443   # HTTPS
sudo ufw allow 22    # SSH (make sure this is allowed first!)
sudo ufw reload
Security note: Port 81 (the admin UI) should not be opened in the firewall. You will access it via an SSH tunnel or restrict it to 127.0.0.1 in the Compose file. Exposing it to the internet is a security risk.
Check the firewall status:
sudo ufw status verboseStep 4. Create the Docker Compose File
At this point, you must create a dedicated directory for NPM and move into it:
mkdir -p ~/nginx-proxy-manager
cd ~/nginx-proxy-manager
Create the Nginx proxy manager Docker Compose YAML file:
nano docker-compose.ymlPaste the following configuration:
services:
  app:
    image: 'jc21/nginx-proxy-manager:latest'
    restart: unless-stopped
    ports:
      - '80:80'
      - '443:443'
      - '127.0.0.1:81:81'   # Admin UI — localhost only (secure)
    volumes:
      - ./data:/data
      - ./letsencrypt:/etc/letsencrypt
image: jc21/nginx-proxy-manager:latest: pulls the official NPM imagerestart: unless-stopped: NPM restarts automatically after a reboot.80:80and443:443: public HTTP and HTTPS ports.127.0.0.1:81:81: binds the admin UI to localhost only, keeping it off the internet../data:/dataand./letsencrypt:/etc/letsencrypt: persistent storage so your config and certs survive container updates.
Step 5. Start Nginx Proxy Manager Docker Compose
Now bring up the container in detached mode:
docker compose up -dCheck that it is running:
docker compose ps
docker compose logs app
You should see the container status as Up.
Step 6. Access to Nginx Proxy Manager Admin Panel
The Nginx proxy manager Docker Compose setup uses port 81 for the admin interface. Since it is bound to 127.0.0.1, you must open an SSH tunnel from your local machine:
ssh -L 8181:127.0.0.1:81 your_user@your_server_ipThen open your browser and go to:
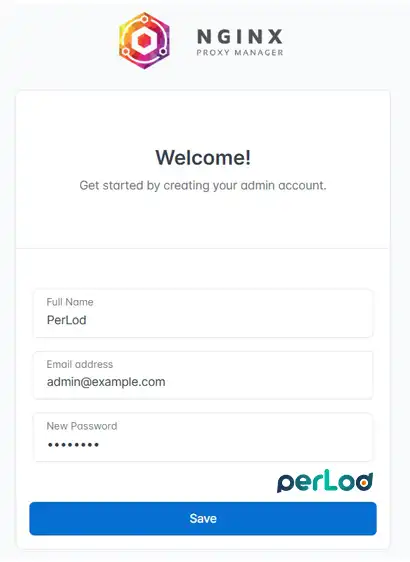
http://localhost:8181Create your admin account:
Step 7. Add a Proxy Host and Enable Let’s Encrypt SSL
This is the core feature of the Nginx proxy manager Docker Compose setup. A proxy host tells NPM where to forward incoming traffic for a given domain.
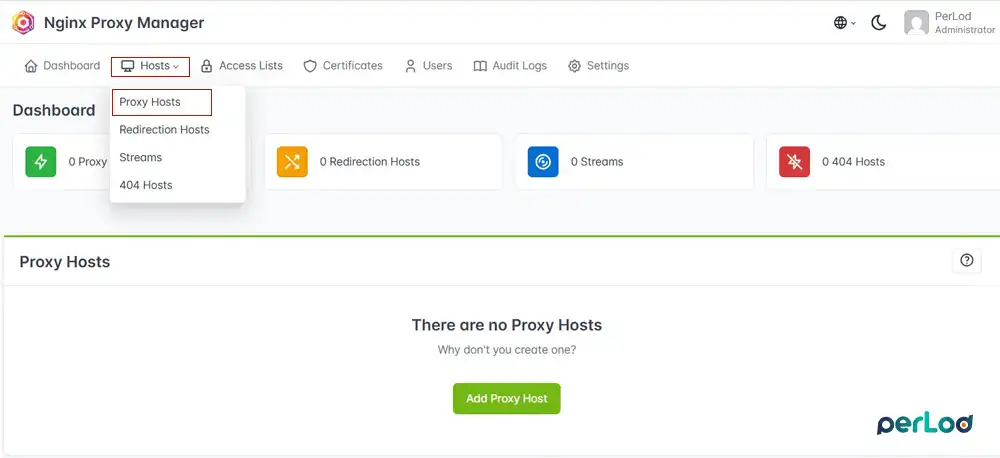
Once you access the NPM dashboard, click Hosts > Proxy Hosts and click Add Proxy Host.
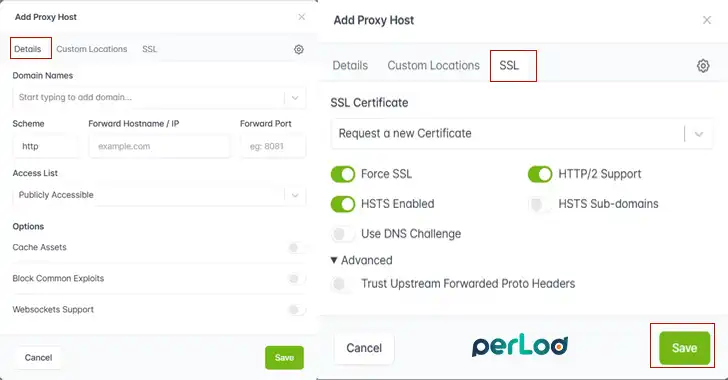
Fill in the Details tab with:
| Field | What to enter |
|---|---|
| Domain Names | app.yourdomain.com |
| Scheme | http |
| Forward Hostname / IP | Container name or host Docker bridge IP, for example, 172.17.0.1 |
| Forward Port | The internal port your app runs on, for example, 3000 |
| Block Common Exploits | Enable ✓ |
| Websockets Support | Enable if your app needs it ✓ |
Finding the Docker bridge IP if your app runs in another container:
ip addr show docker0
# Usually 172.17.0.1
Or, if your app is on the same Docker network as NPM, use the container service name directly as the hostname.
Now switch to the SSL tab:
- SSL Certificate > select Request a new SSL Certificate.
- Enable Force SSL to redirect HTTP to HTTPS automatically.
- Enable HTTP/2 Support.
- Enable HSTS, optional but recommended.
- Click Save.
NPM will reach out to Let’s Encrypt, complete the HTTP-01 challenge, and install the certificate automatically. This usually takes about 10 to 30 seconds.
Certificates renew automatically. Let’s Encrypt certificates expire every 90 days, but NPM renews them without any cron jobs or manual steps needed.
Step 8. Connect Apps on the Same Docker Network
The best way to use the Nginx proxy manager Docker Compose stack is to put NPM and your apps on a shared Docker network. This lets you use container names as hostnames instead of IP addresses.
Update your NPM Docker Compose YAML file:
services:
  app:
    image: 'jc21/nginx-proxy-manager:latest'
    restart: unless-stopped
    ports:
      - '80:80'
      - '443:443'
      - '127.0.0.1:81:81'
    volumes:
      - ./data:/data
      - ./letsencrypt:/etc/letsencrypt
    networks:
      - proxy

networks:
  proxy:
    name: proxy
    driver: bridge
And in your app’s docker-compose.yml, attach it to the same network:
services:
  myapp:
    image: myapp:latest
    networks:
      - proxy

networks:
  proxy:
    external: true
Now in NPM’s proxy host, set Forward Hostname / IP to myapp, and it resolves directly via Docker DNS.
Update and Maintain NPM
Keeping Nginx proxy manager Docker Compose up to date is easy. To do this, you can use the commands below:
cd ~/nginx-proxy-manager
docker compose pull
docker compose up -d
Your configuration, proxy hosts, and certificates are stored in the ./data and ./letsencrypt volumes and survive updates.
To back up your NPM data, you can use:
docker compose down
tar czf npm-backup-$(date +%F).tar.gz data letsencrypt
docker compose up -d
For the official documentation and latest Docker image tags, you can visit the Nginx Proxy Manager official documentation.
Conclusion
The Nginx proxy manager Docker Compose combination is one of the fastest ways to get a reverse proxy running on a Linux VPS. You get a GUI, automatic Let’s Encrypt SSL, and persistent storage, all without touching a single Nginx config file. Whether you are self-hosting a few small apps or building a full stack, this setup handles it well and stays easy to manage as you grow.
For anything more complex, like label-based auto-discovery or multi-server setups, you can always migrate to Traefik later.
If you need a fresh Linux VPS for your reverse proxy and app stack, you can start with a PerLod Linux VPS.
FAQs
Can I use Nginx Proxy Manager with multiple Docker apps on the same server?
Yes. Put NPM and your apps on the same Docker network and use container names as the forward hostname.
What’s the difference between Nginx Proxy Manager and Traefik?
NPM is GUI-based and beginner-friendly. Traefik auto-discovers Docker services via labels and is better for larger automated setups.
Does Nginx Proxy Manager renew SSL certificates automatically?
Yes. NPM handles Let’s Encrypt renewal automatically, no cron jobs needed.
